Form Widget Overview (API Only)
Video:
Article:
The Form Widget lets you create pre-built forms and bypass all the mapping, arranging, fiddling and fussing you'd have to do with custom forms. Adding the Form Widget to your page is easy!
Please note: You can ONLY use the Form Widget with our API integrations, you can't use it with HTML forms.
Step One:
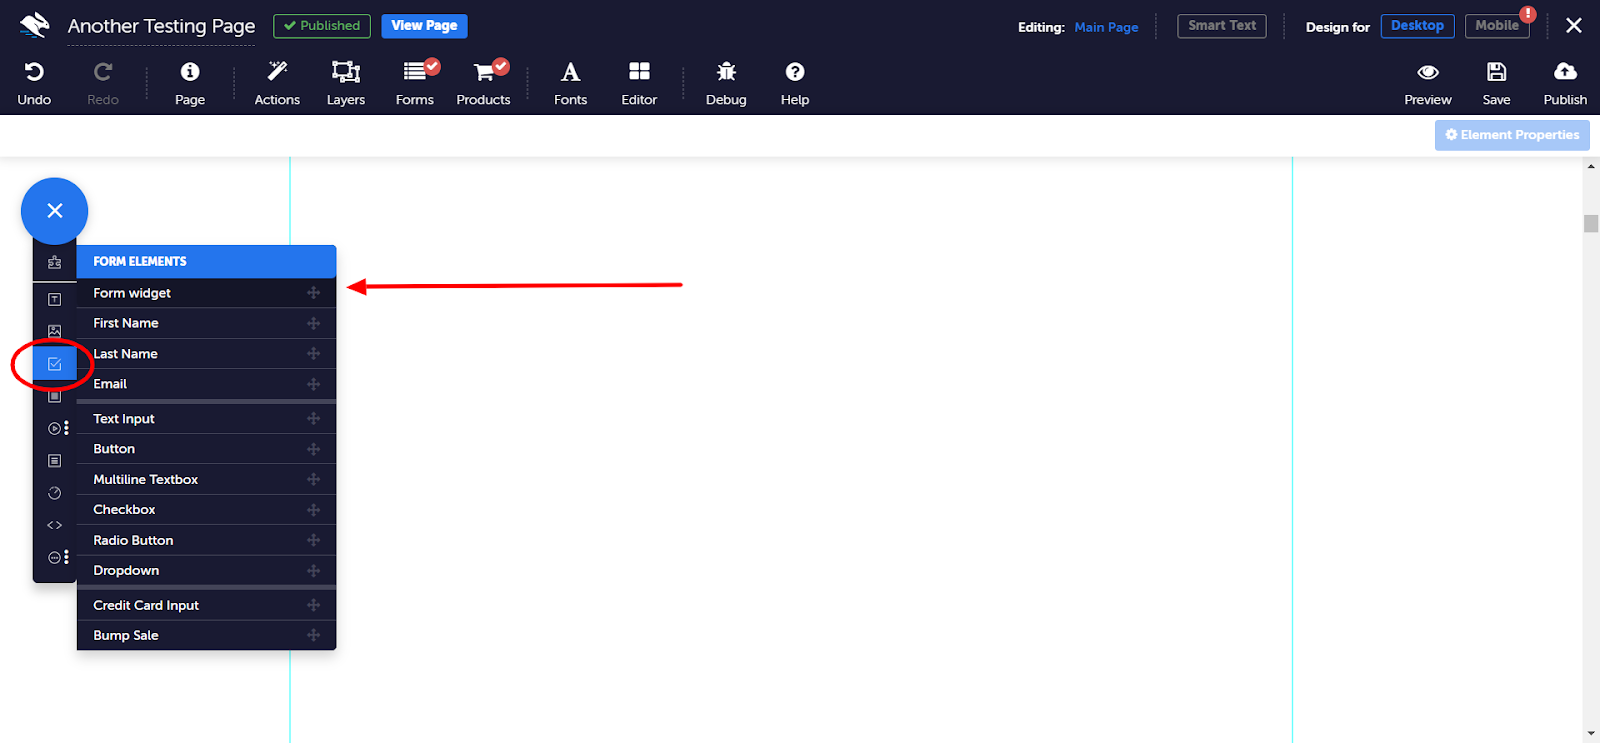
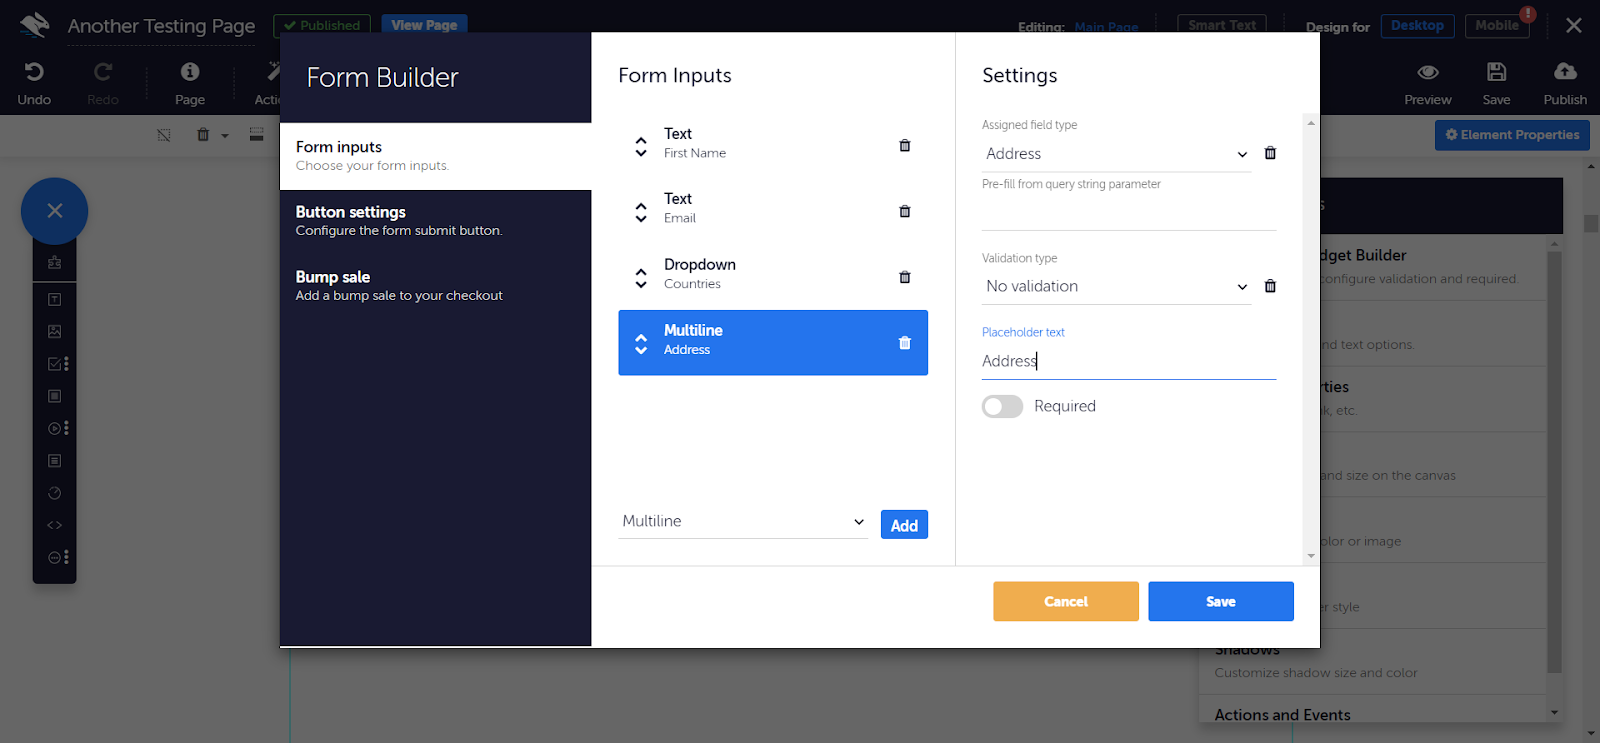
In the Page Editor, click on Form Elements In the Element Tray, and select the Form Widget. The Form Builder will open at Form Inputs:
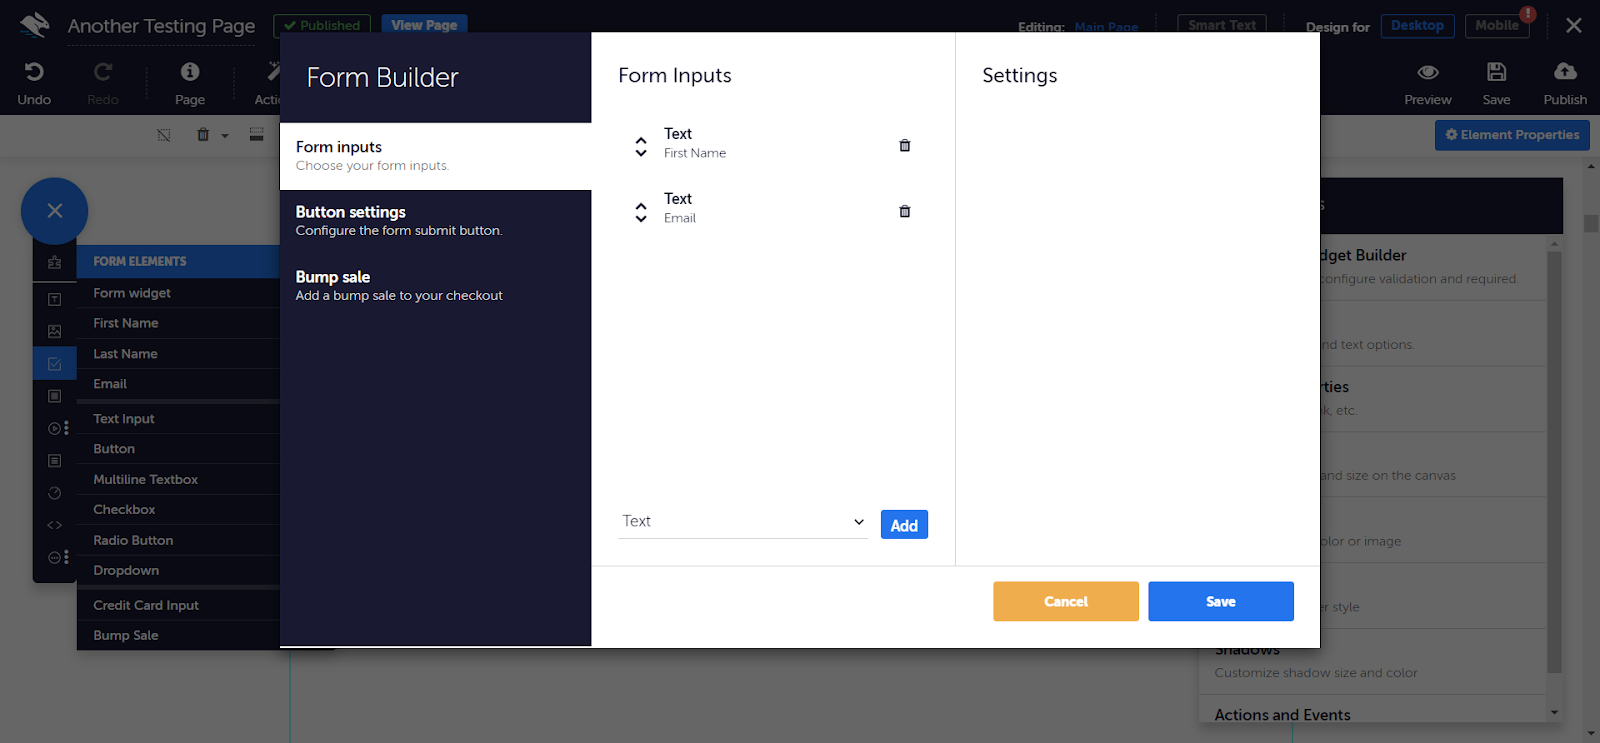
Here you can add and remove the text inputs in your form. You can choose from Text, Multiline, Checkbox, Dropdown, Radio button, Credit Card input, Address input, and New Step which you can use to create a multi-step form.
Step Two:
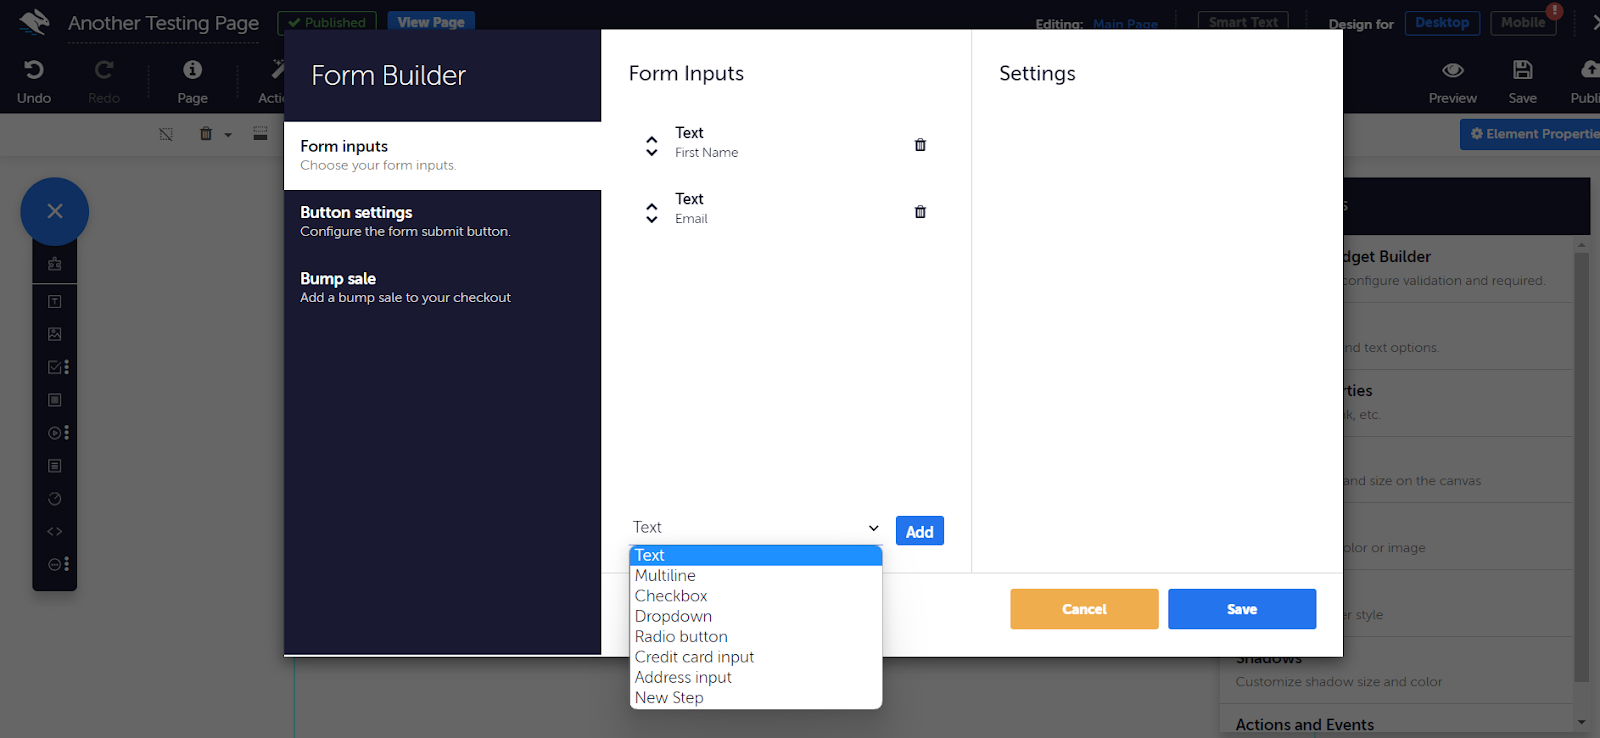
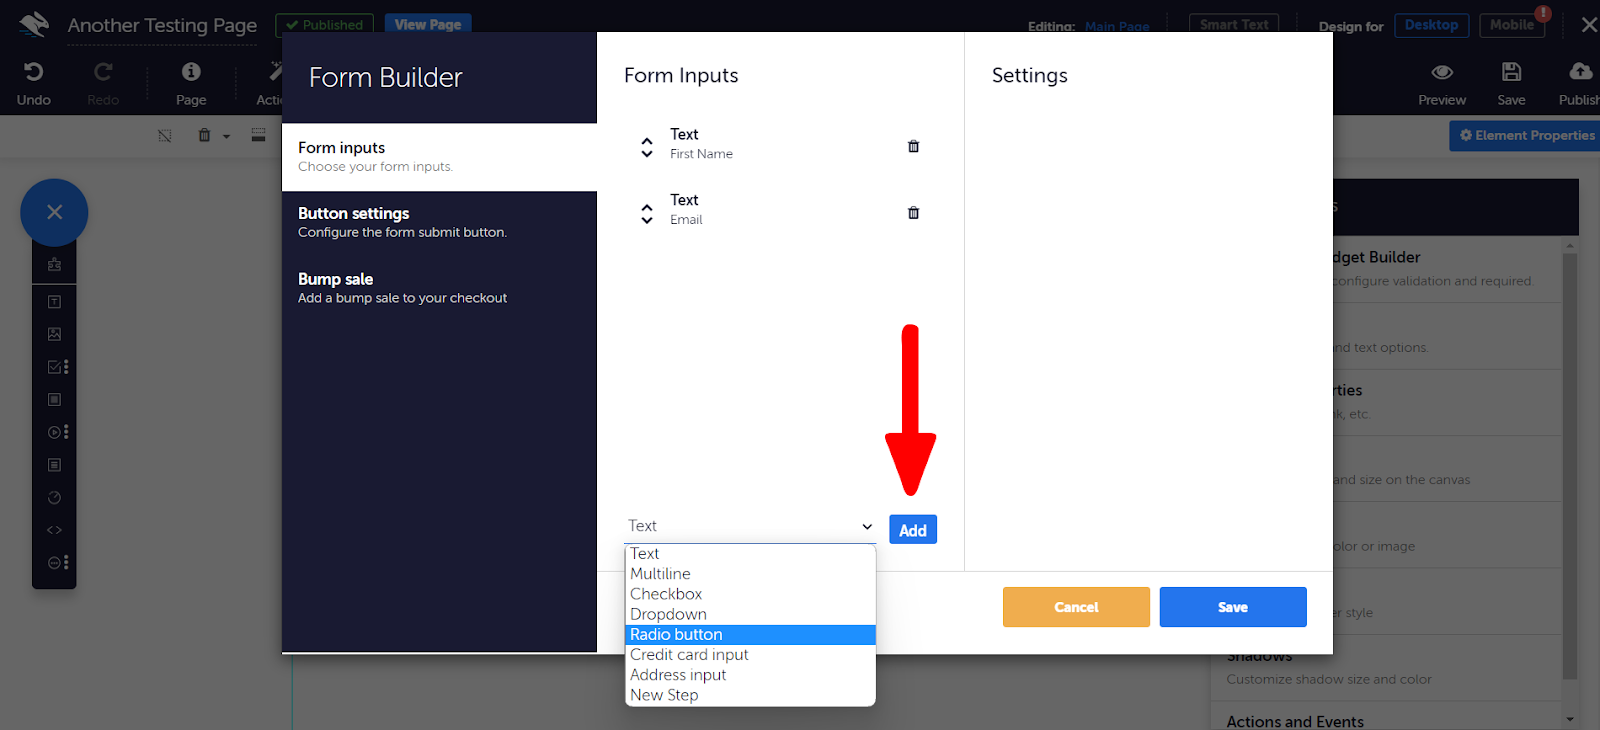
Click on the dropdown menu to select the input that you would like to use, and then click on Add:
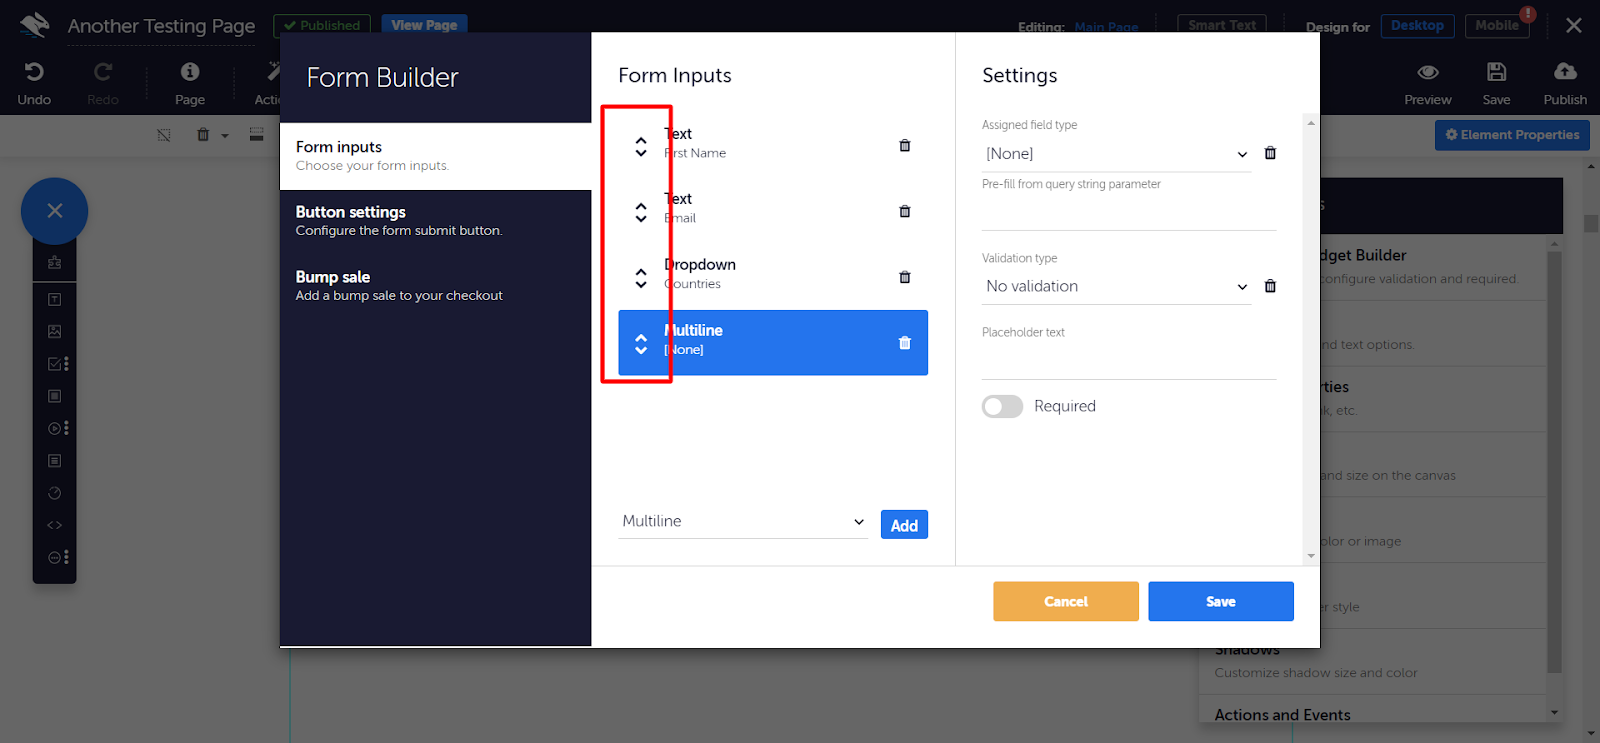
Then click on the input(s) to view and adjust its settings. Here you can assign your form field types, add query string parameters, validation, edit your placeholder text and select whether it's required or not.
You can use the arrows to move your elements up and down to adjust their order in your form:
Step Three:
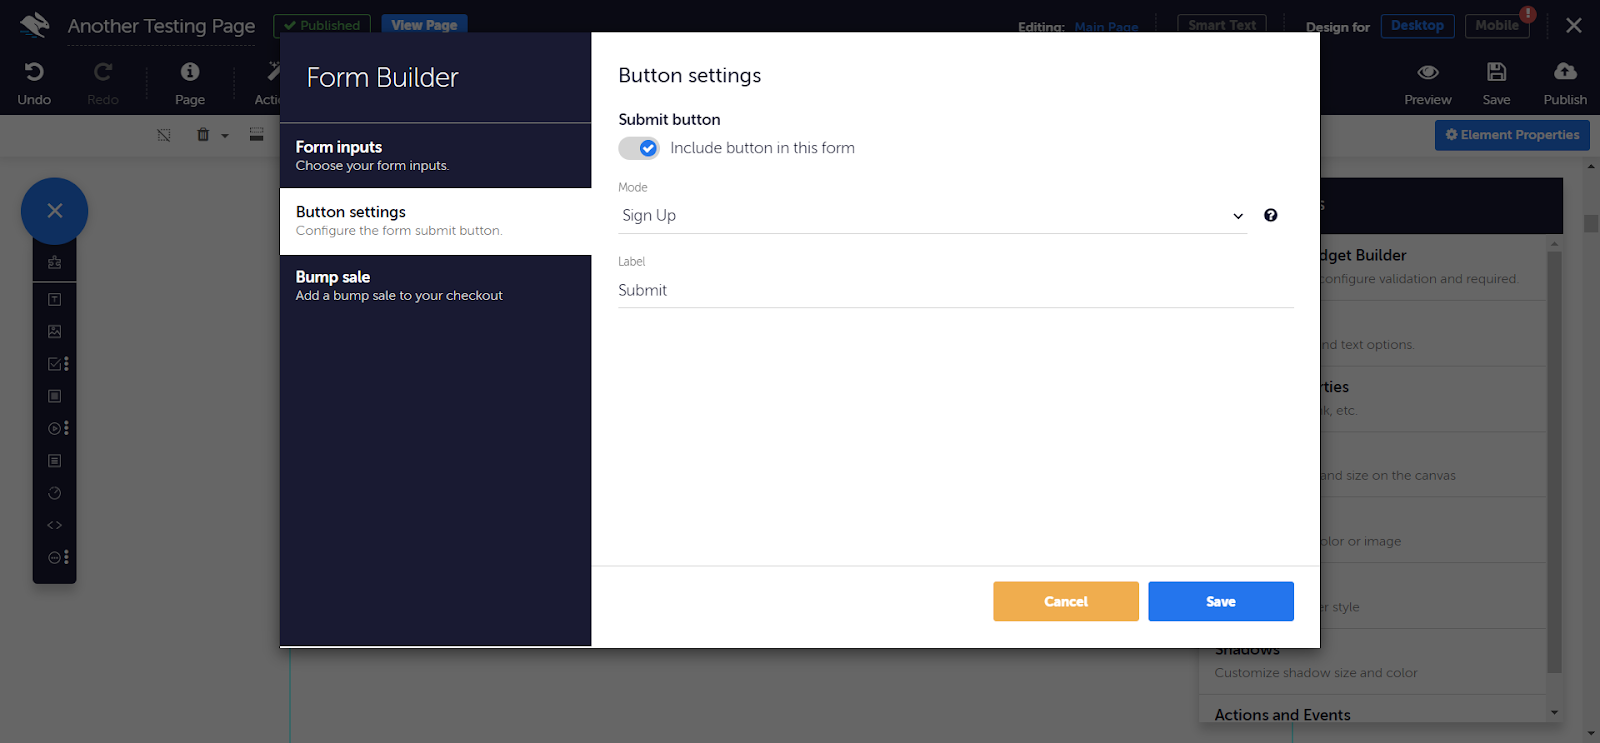
Click on the Button Settings tab to set up your submit button. Here you can choose whether to include a submit button, the button mode and edit the label:
When you are happy with your form's setup, click on Save. This will close the Form Builder, and you will be able to see the form on your page:
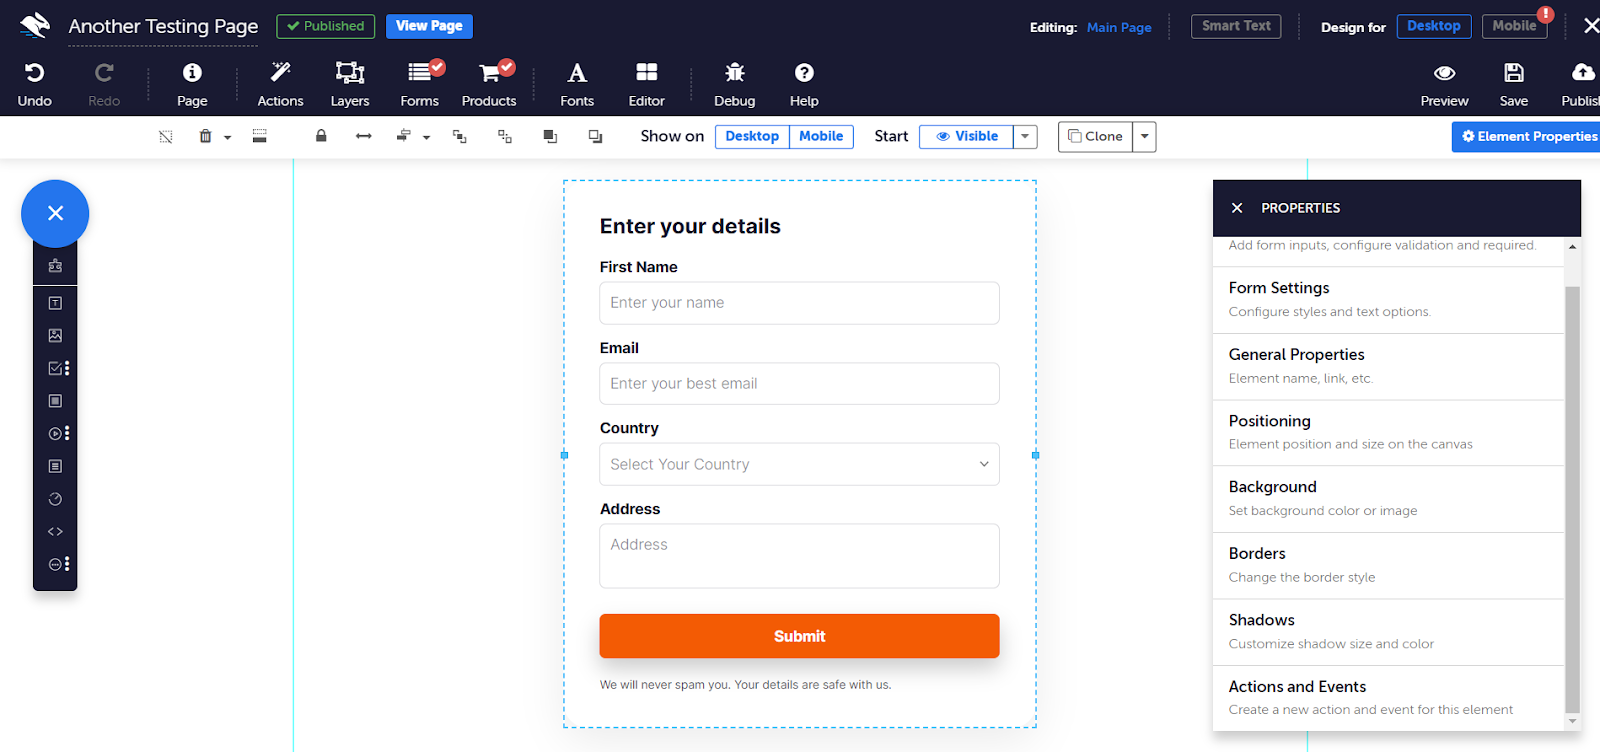
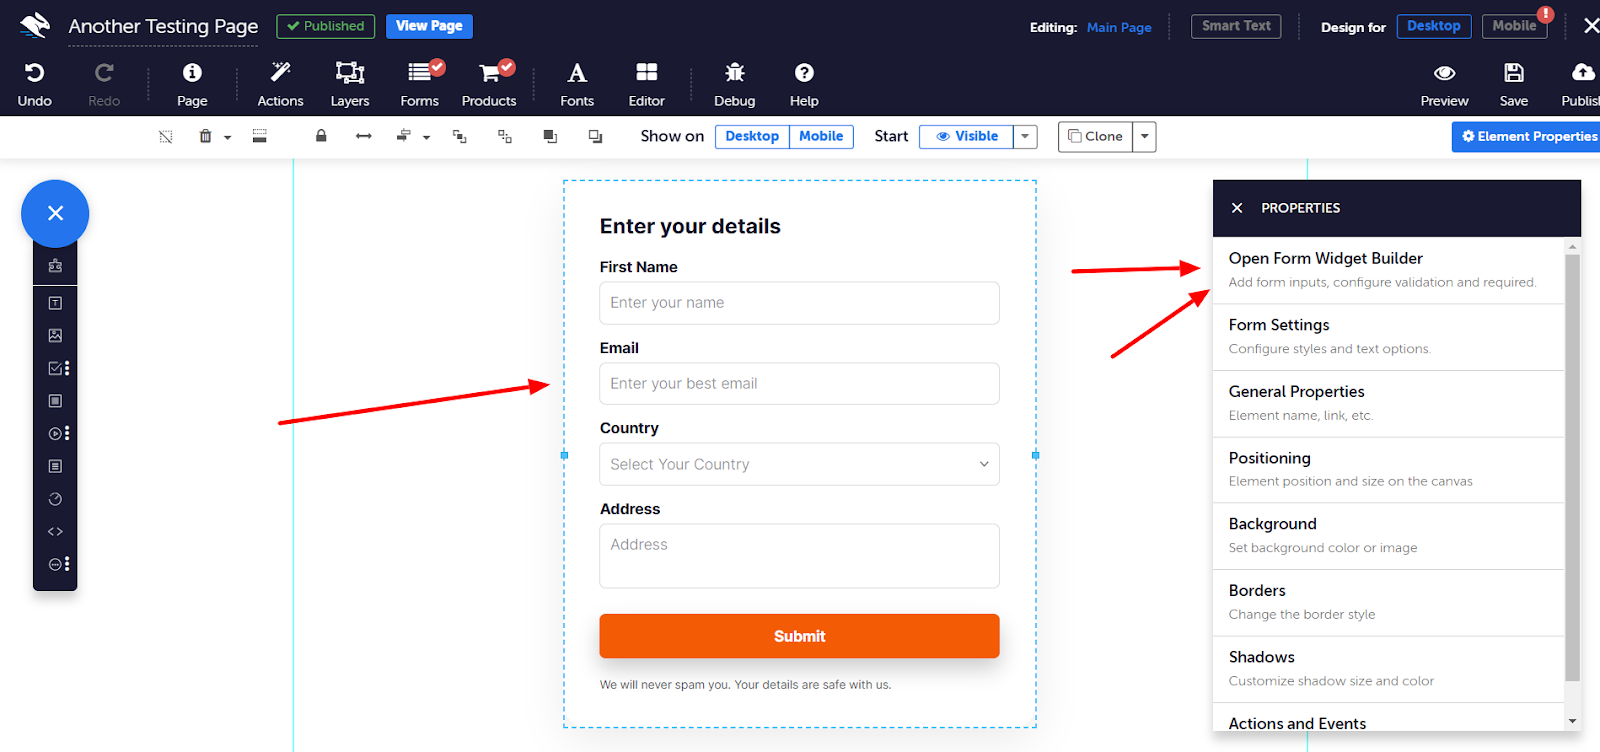
Note: You can open the Properties panel and click on the Open Form Widget Builder tab to access the Form Builder to make any changes if needed.
Step Four:
To configure the forms styles and text options click on the Form Settings tab in the Properties panel (which will open when you close the Form Builder). Here you can edit the Font Styles, Text Settings, Input Settings and Button Settings of your form:
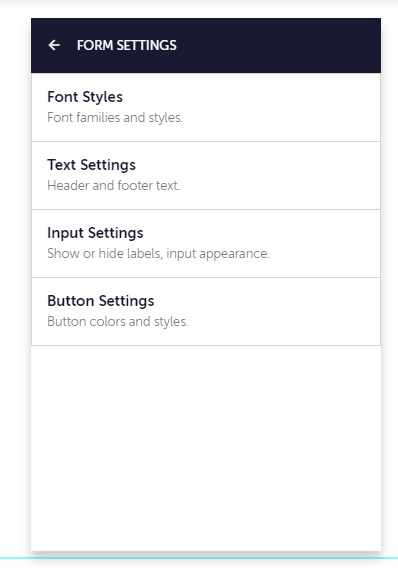
Font Styles: Here you can adjust your Heading and Paragraph font, it's color, weight, size and it's scaling on mobile.
Text Settings: Here you can edit the Heading and Footer text for your form.
Input Settings: Here you can choose whether to hide or show your input labels, the background color of the inputs and their border color.
Button Settings: Here you can change the background, border and text color of your inputs.
If you are wanting to add a bump sale to your page, open the Form Widget Builder and navigate to the Form Builder’s ‘Bump Sale’ tab. Then add a bump sale to your checkout by selecting product in the dropdown
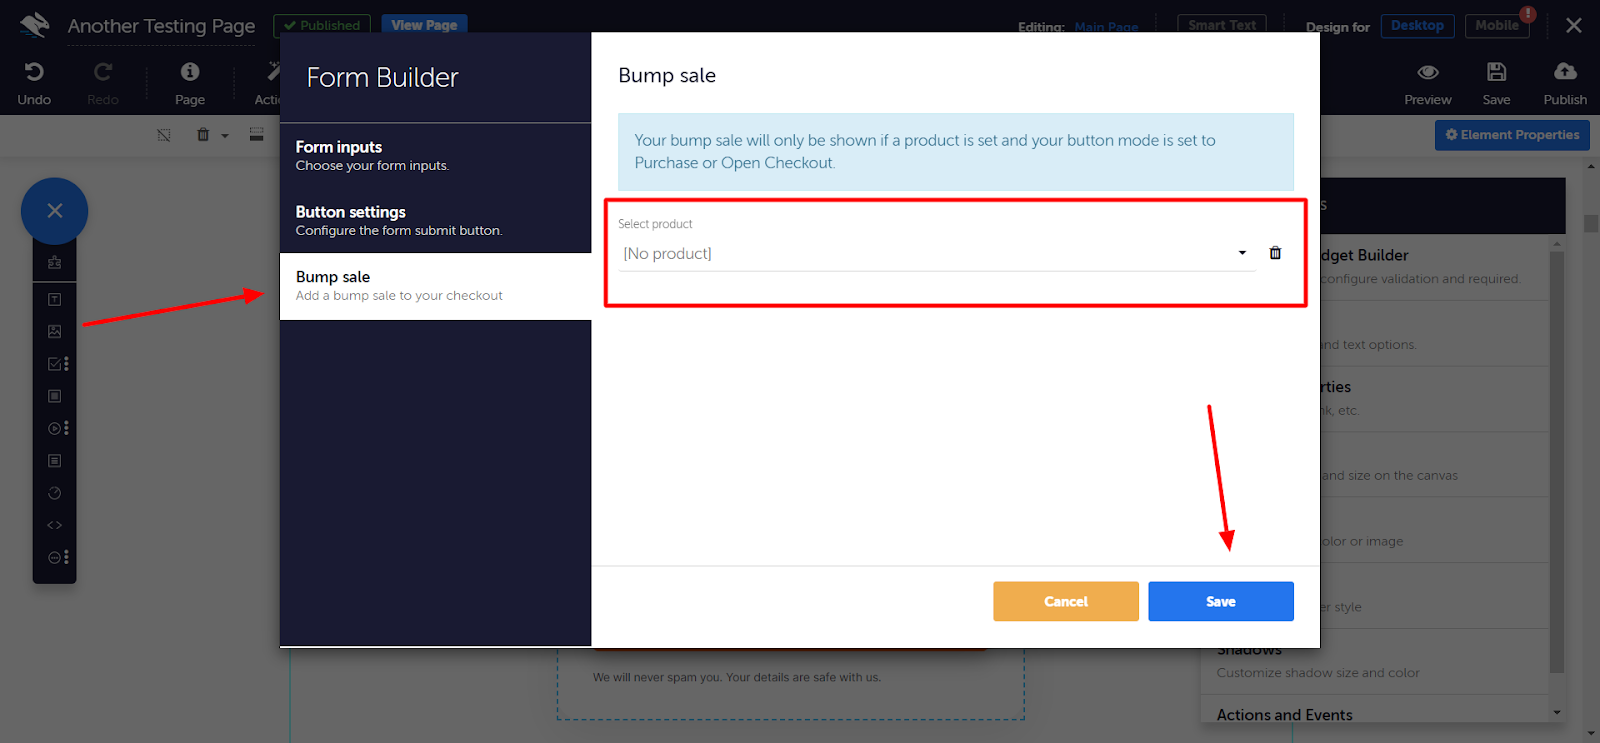
Note: Your bump sale will only be shown if a product is set and your button mode is set to Purchase or Open Checkout.