Full ConvertKit Walkthrough
Video Tutorial:
Article:
This article is going to be a full ConvertKit autoresponder walkthrough, from integrating to setting up your form with ConvertKit in Convertri.
1. Go to the Account Dashboard and select Integrations from the left-hand menu. Scroll down until you see the ConvertKit option and then click on it.
2. This will open and you’ll see a box you need to fill out. To find the information for these, log into your ConvertKit account in a different web browser tab.

3.On your ConvertKit account, click on the ConvertKit Account Settings by going to your profile avatar in the top right-hand corner and click the dropdown. Select the option for General Account Settings.
4. This will take you to your account settings in ConvertKit and if you scroll you will see the API Secret Key which you need to click Show to reveal and can then copy and paste back into Convertri. Once you have entered this field, click Save. Please note that Convertri now uses V4 keys.
5. Once you’ve done this, there will be a green tick next to the ConvertKit integration option, showing the integration was successful.
6. Go back to your tab where you logged into ConvertKit and go back to the main account dashboard. To edit the different forms which you will be able to select as targets within Convertri, select Landing Pages and Form Signups from the top toolbar. You’ll get a page which looks like the one below:
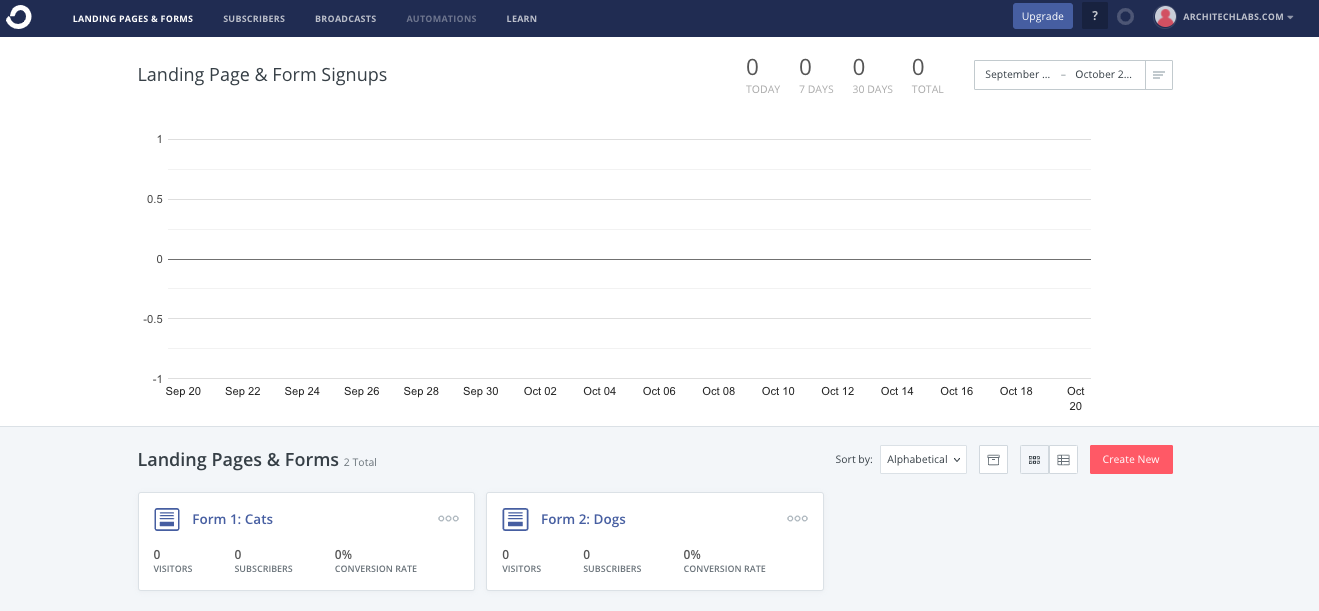
7. Here you will be able to see the Forms in your account, these are different places where you can categorise your subscribers based on what they signed up for. You could have one form for those interested in dog products, and one form for those interested in cat products, for example. Here you can manage your forms and create new ones using the icon labelled ‘Create New’.
8. Once you have made the forms you need, go back to Convertri and open the Funnel and then Page where you wish to add in the form.
9. The minimum two elements you will need to create a form is an Email Input Box and a Submit Button. You can add these to the page by going to the Elements tray and clicking on Form Elements. Here you will find an Email element and a Submit element which you can add to the page.
10. Once you have these, select Forms from the top menu bar. Next, select Autoresponders and then ConvertKit. You will see the box below:
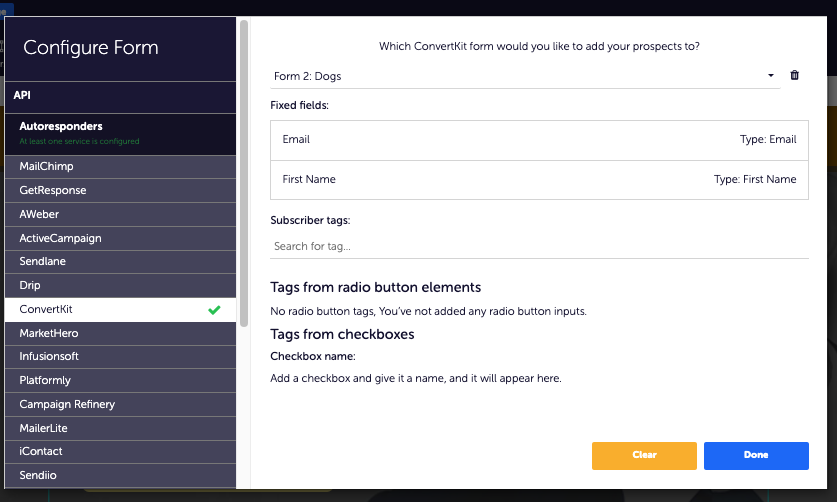
11. You can see the Fields which you added in on your page, such as Email and First Name. At the top you have the option to select one of the Forms, which is of the Forms you set up earlier, to decide where these email addresses will be stored in ConvertKit.
12. Here you need to map the Form Fields which you added on the page. This ensures that your autoresponder service understands the information which the user is giving it. This means using the dropdown next to the Form Fields to select the kind of information they are, such as the respondent's First Name. For more information on this, go here. When you are happy with this, click Next.
13. Next, you will be taken to this box where you can decide if you want the user to be sent to a Thank You page when they have filled in your form. If you don’t want this, toggle on the ‘Stay On Page’ option. If you do want this, enter the URL of a Thank You page you have made so they can be taken there.
14. Click Done and a red tick will appear near the Forms icon, showing you that your form with ConvertKit is set up and ready to be published.