Forms Overview
Video:
Article:
Adding forms to your Convertri pages is easy, and fully customisable.
There are two elements to every form: Form Inputs, which are the elements you drag onto your page for your prospects to enter their details, and the behind-the-scenes Forms configuration.
Form Configuration
It’s a good idea to configure your forms before you add input elements to your page. There are three ways to do it: API, HTML, or Email.
- Form API’s let you connect to popular services for easy integration
- HTML lets you embed your own form code
- Email lets you send submitted form information to your main account email
To set up an API form:
-
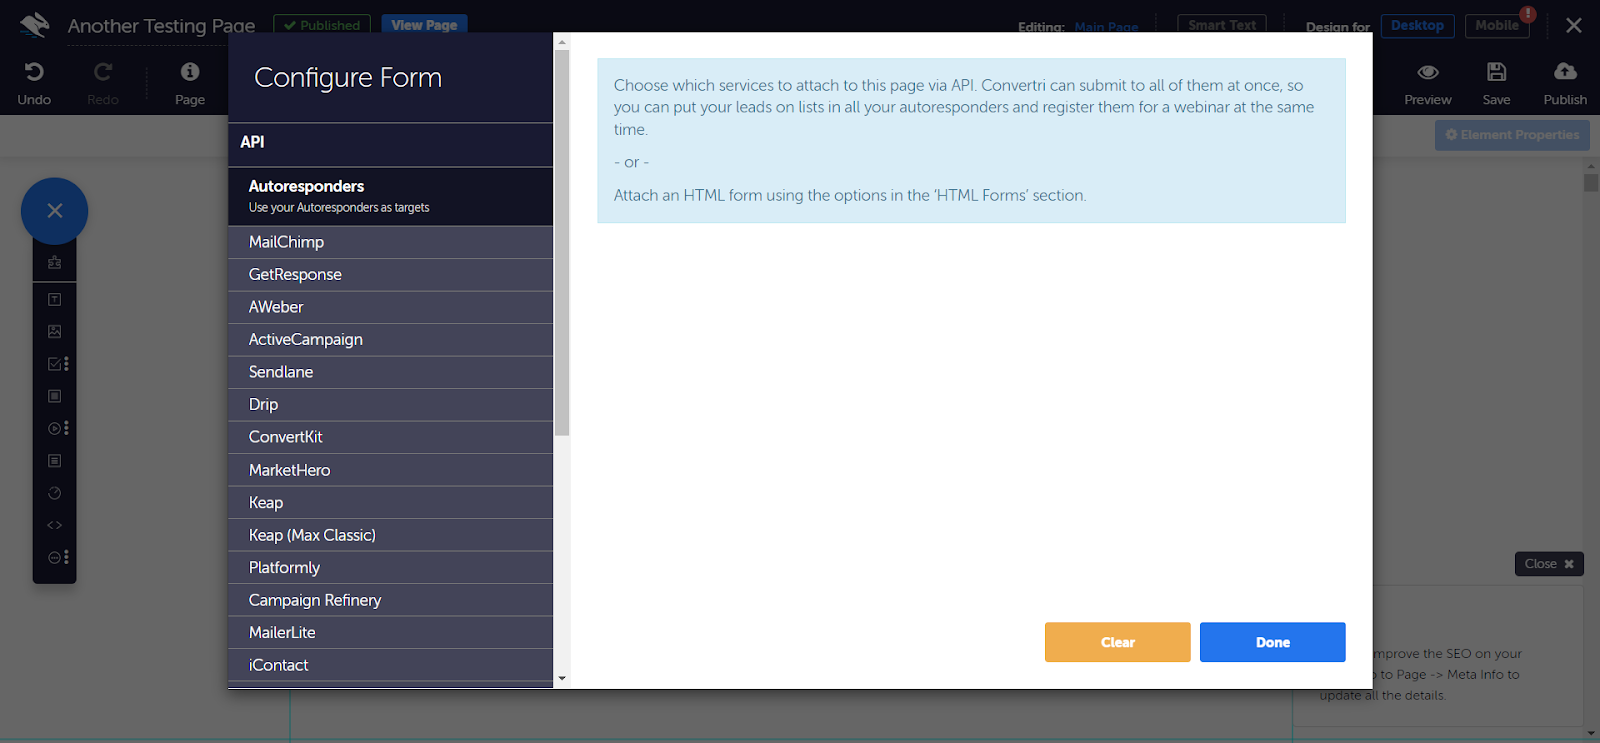
Click the Forms button in the top toolbar.
-
In the Configure Forms dialog, click the type of service you want to integrate: Autoresponder, or Webinar. Then, choose your service from the menu.
-
If you haven’t integrated your service already, you’ll be prompted to open Integrations in a new tab. You can integrate your services (or remove them) at any time by heading to the Dashboard, and clicking Integrations in the left hand menu.
-
Depending on the service you connect, you’ll be prompted to choose the list you want your form to add prospects to.
- Connect the form fields in your service to the form inputs you’ll add to your Convertri page. When you select a field type here, that’s the field the information will be entered into in the autoresponder or webinar service. If you want to collect information that doesn’t have a corresponding field type, you can use any one that isn’t already mapped and match it using the Properties panel when your Form Input elements are selected. Some form fields are fixed, so they cannot be changed.
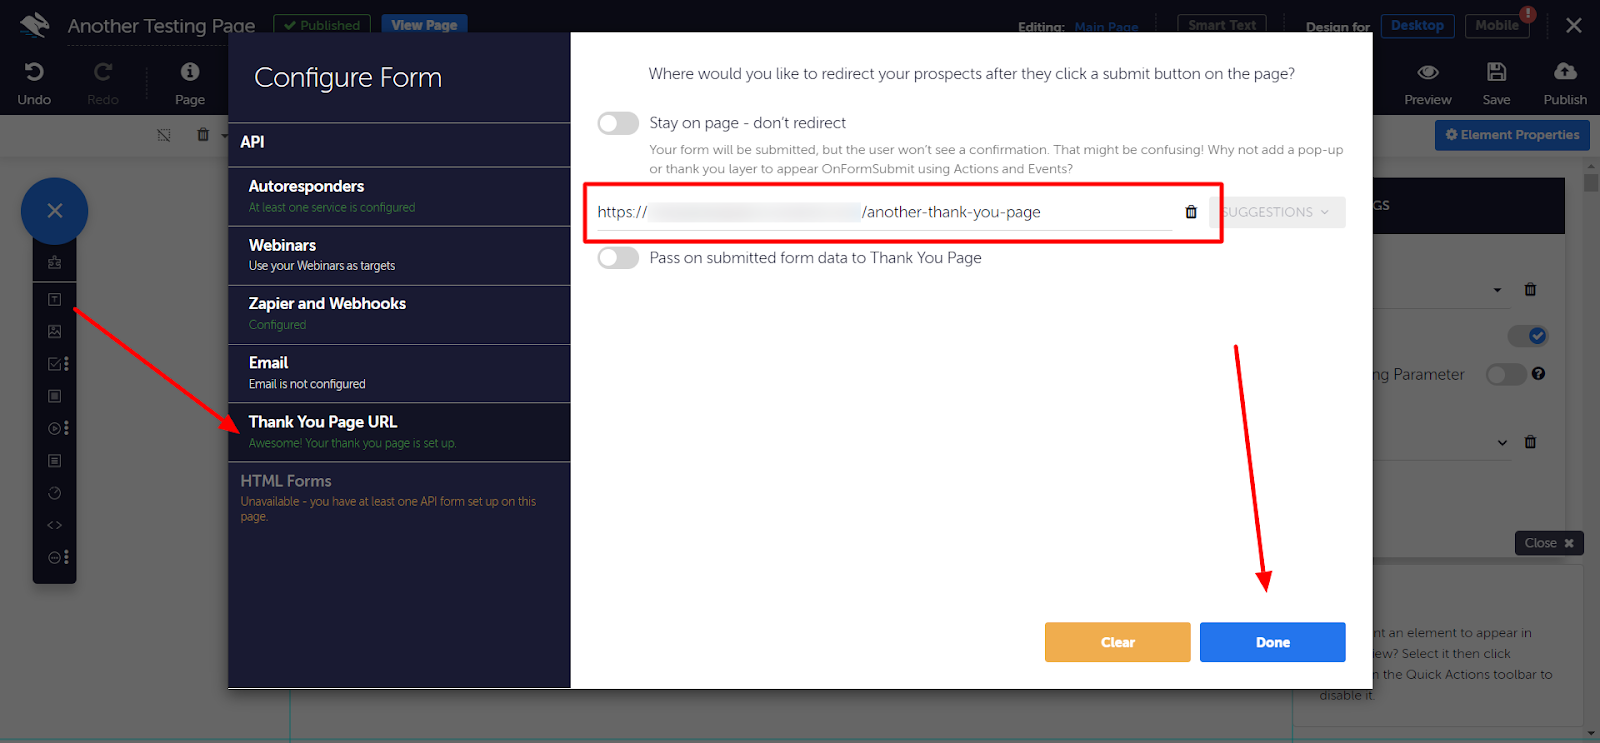
- When you’re done, click Thank You Page URL to enter the URL of the page you want your prospects taken to after they click Submit.
-
Click Done.

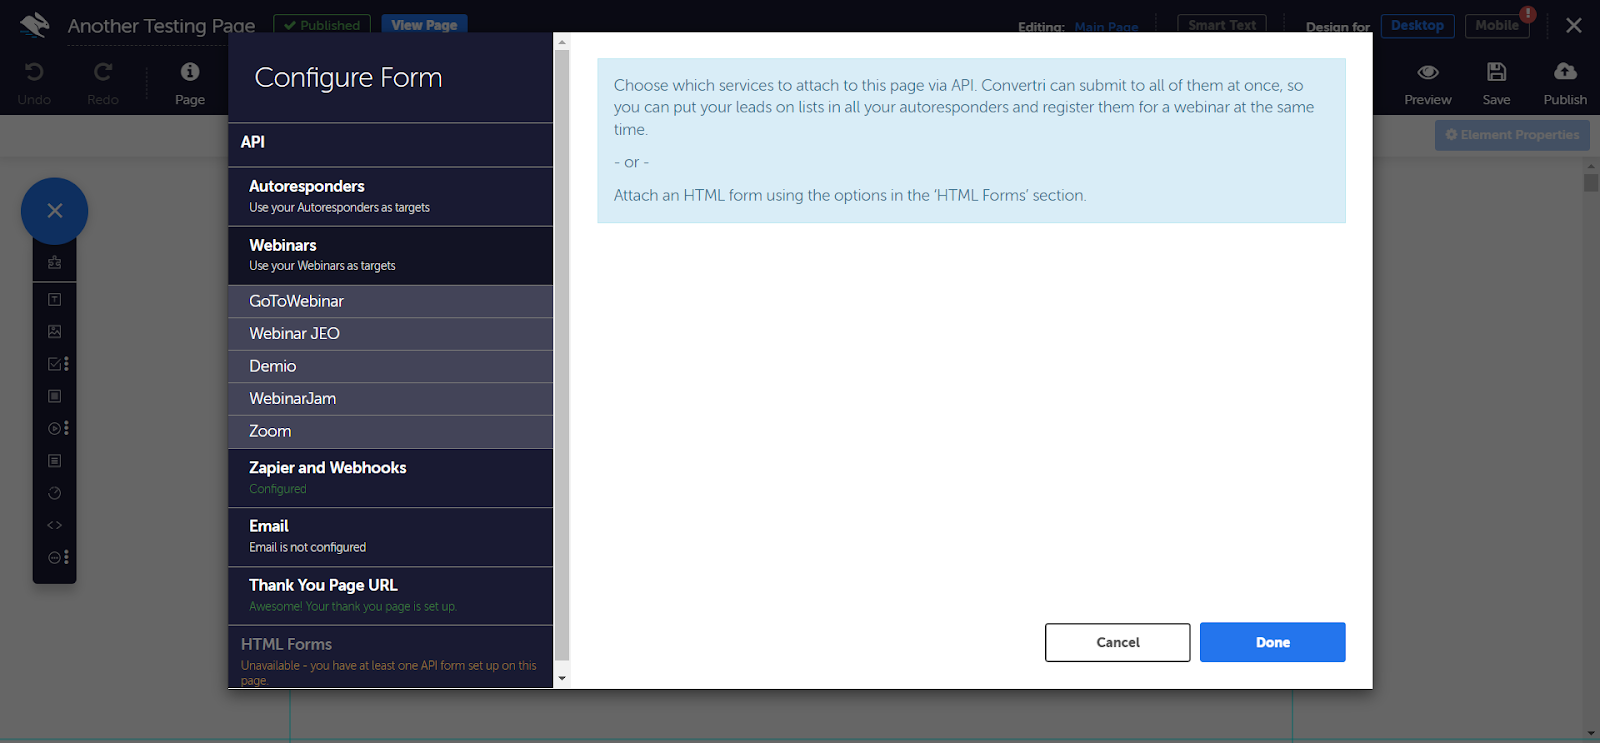


You can connect both autoresponder and webinar services to one form, to sign up prospects to both lists at once: simply repeat steps 2-5 to add another service.
Your form is connected to your page, and you can now add form inputs.
To set up a HTML form:
- Click the Forms button in the top toolbar.
-
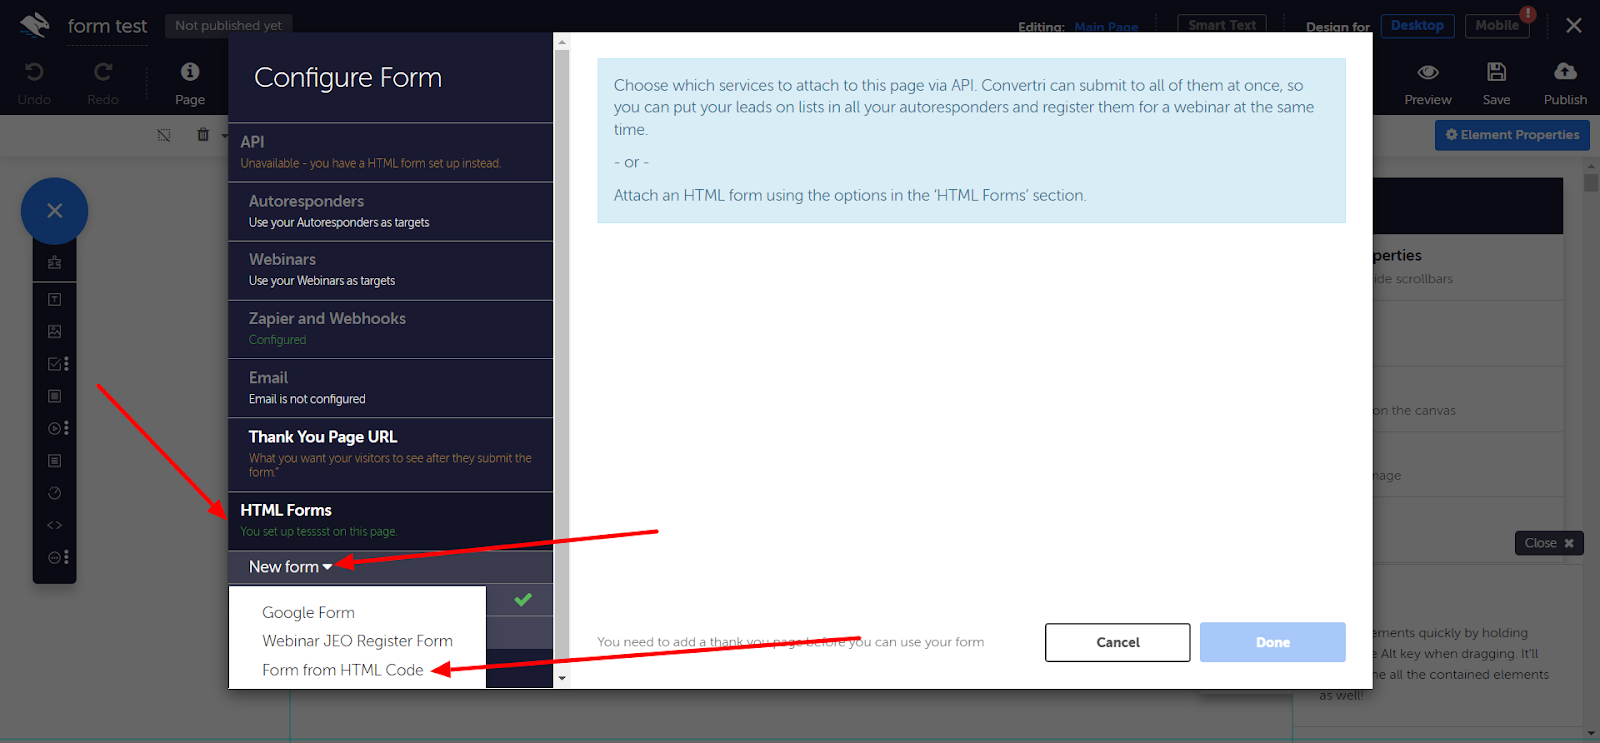
In the Configure Forms dialog, click HTML Forms, New Form, and then Form from HTML Code.
-
Give your form a name, and enter the HTML code for your form. Click Create.
-
Click the small arrow to the right of your form name to connect it to the page.
- Click Done.


Your form is connected to your page, and you can now add form inputs.
When a form is successfully connected to your page, a red check will appear on the Forms button in the top toolbar.
To set up a Email contact form:
- In the Page Builder, click Forms in the top toolbar.
- Click Email in the left hand menu, and toggle ON ‘Email notifications’.
-
Edit the subject line if you need. Select Email Address where you want to be notify every time there’s a form submission.
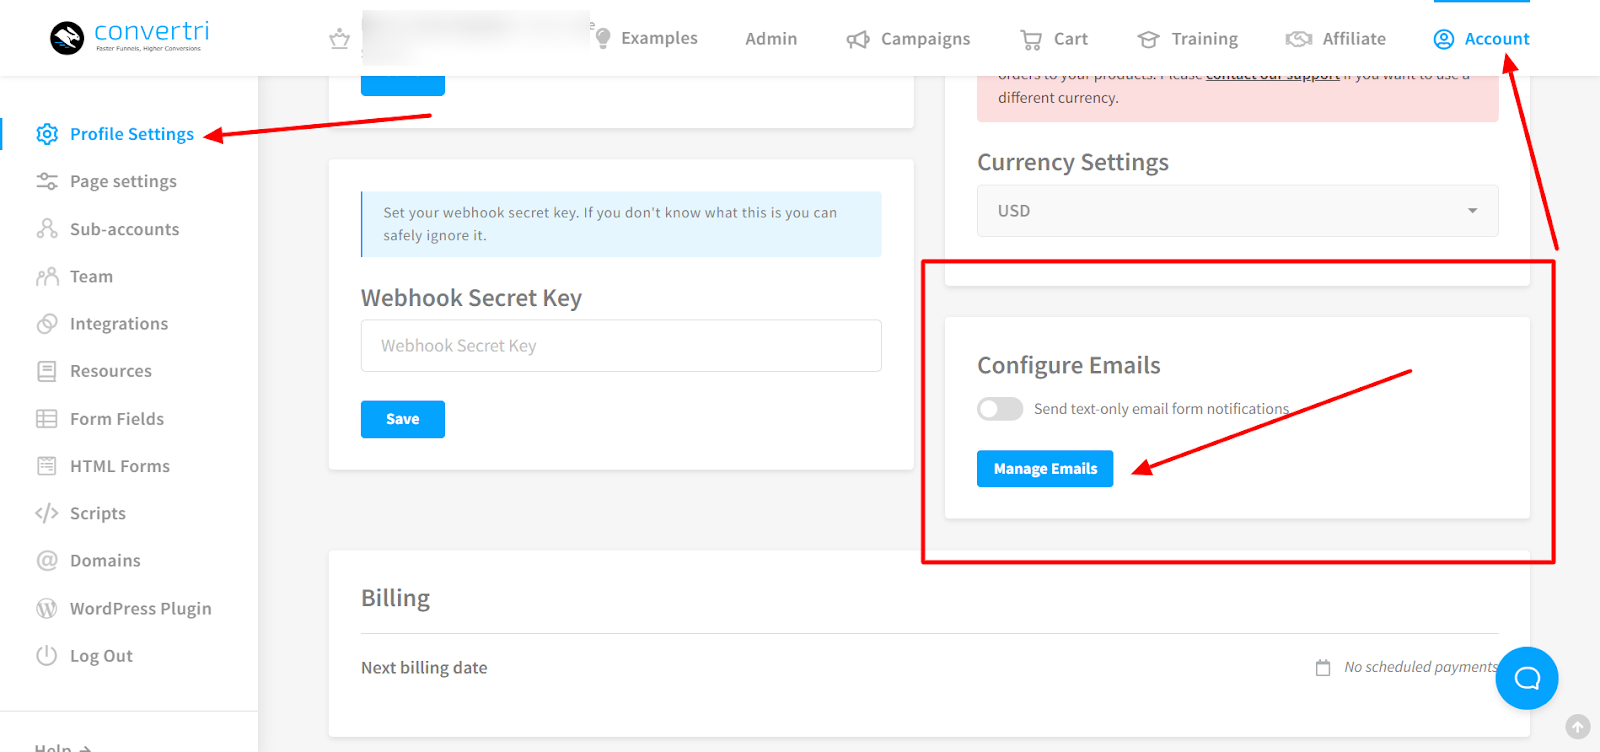
To add more Email Address options, go to Account >>> Profile Settings >>> Configure Emails >>> Click ‘Manage Emails’ then add the email address.
A message will be sent to the email address you’ve added asking for verification. Once they accept, you will be able to send form notifications to this email.
- When you’re done, click Thank You Page URL to enter the URL of the page you want your prospects taken to after they click Submit.
- Click Done.


Form Inputs
Once you’ve connected a form service, HTML form or an email form, it’s time to add the form inputs. These are the elements your prospects will interact with on the page.
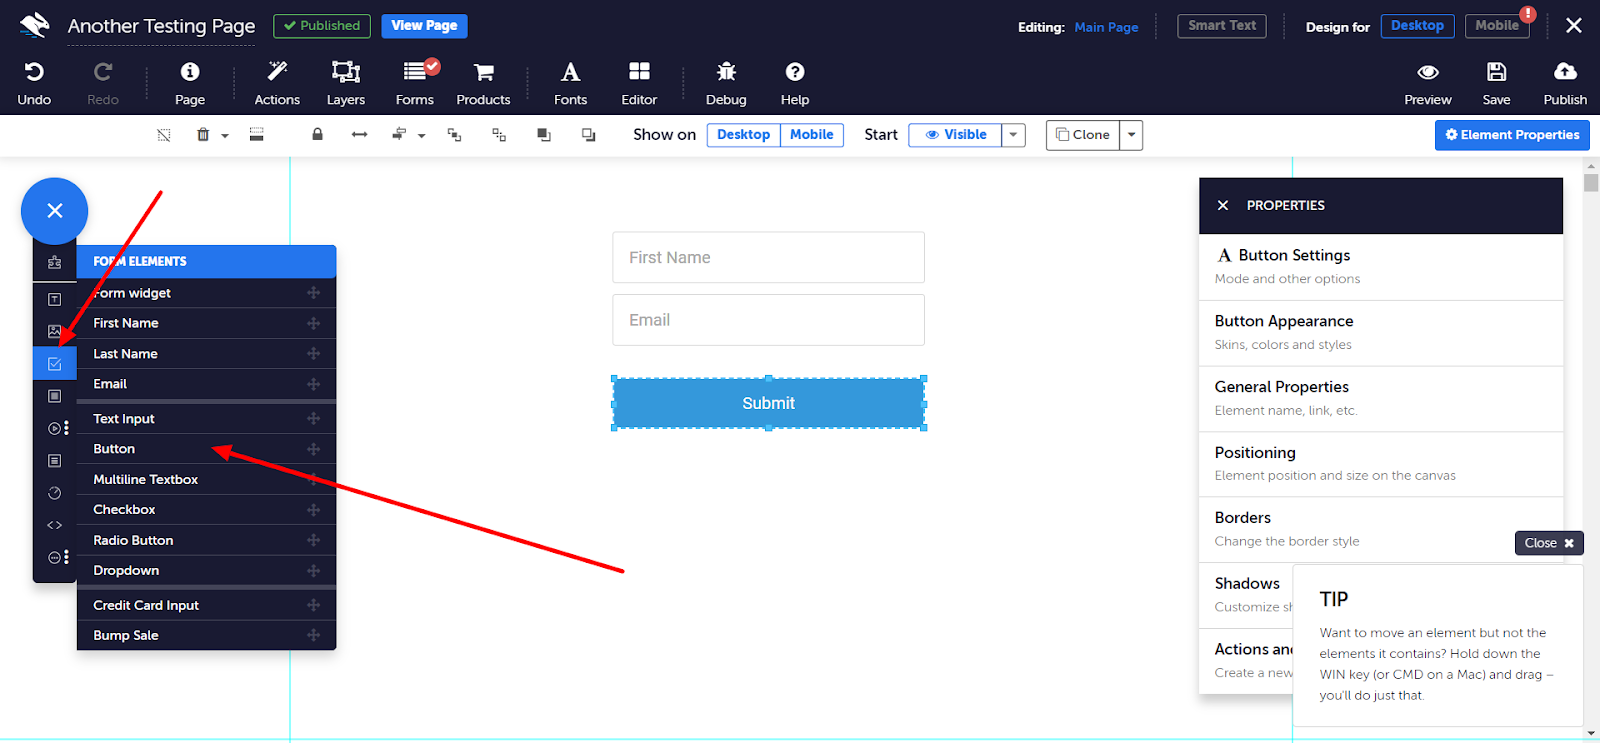
- In the Page Builder, click the Form Elements button in the Elements tray. Choose the input you want to add first, and drag it onto your page.
-
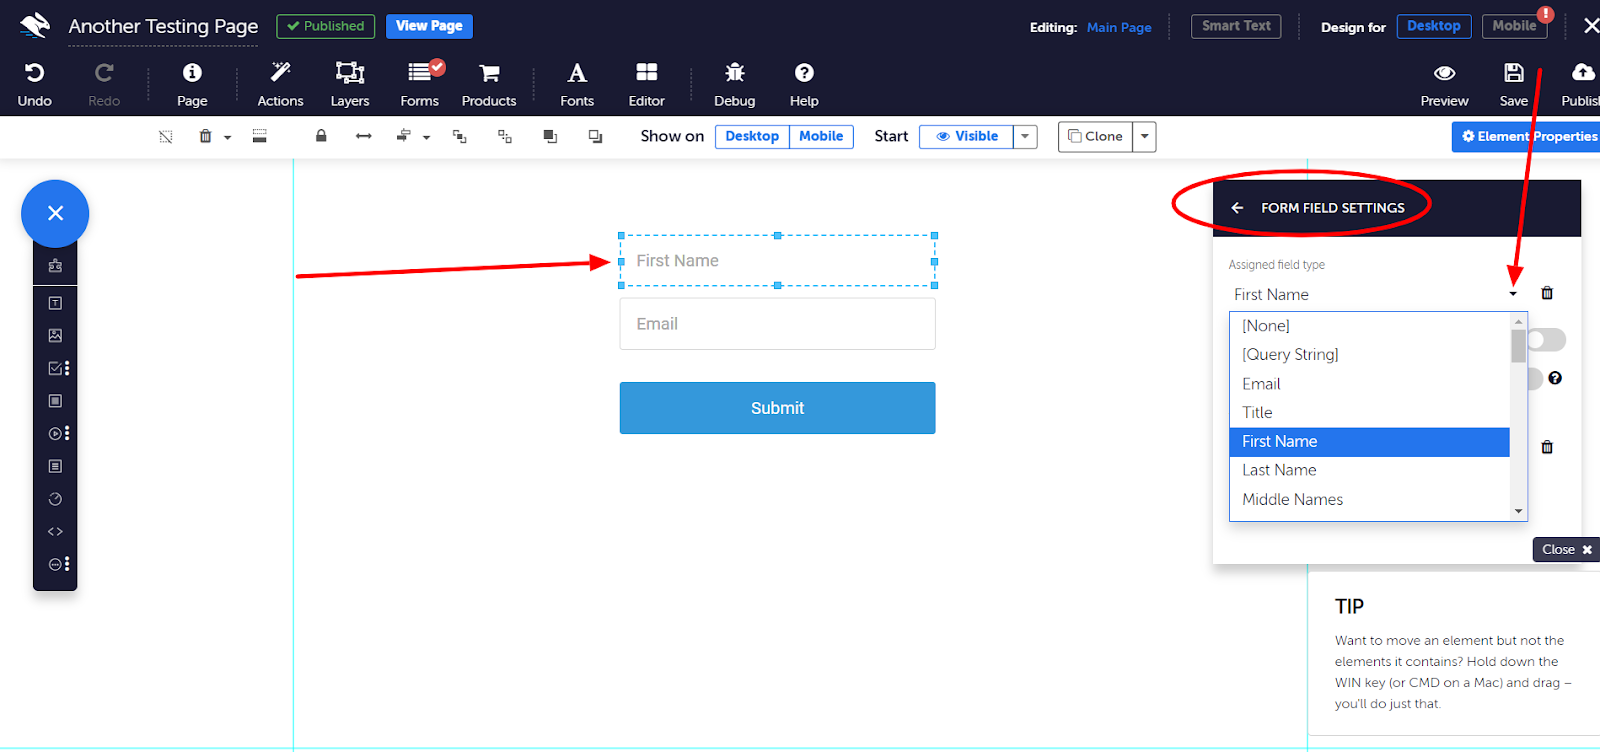
In the Properties panel, click Form Field settings to map your form fields to the values you assigned when you configured your form service. Choose your field type to make sure the input is sent to the form service correctly. If you want to collect information that doesn’t have a corresponding field type, you can use any one that isn’t already mapped and match it using the Forms dialog.
-
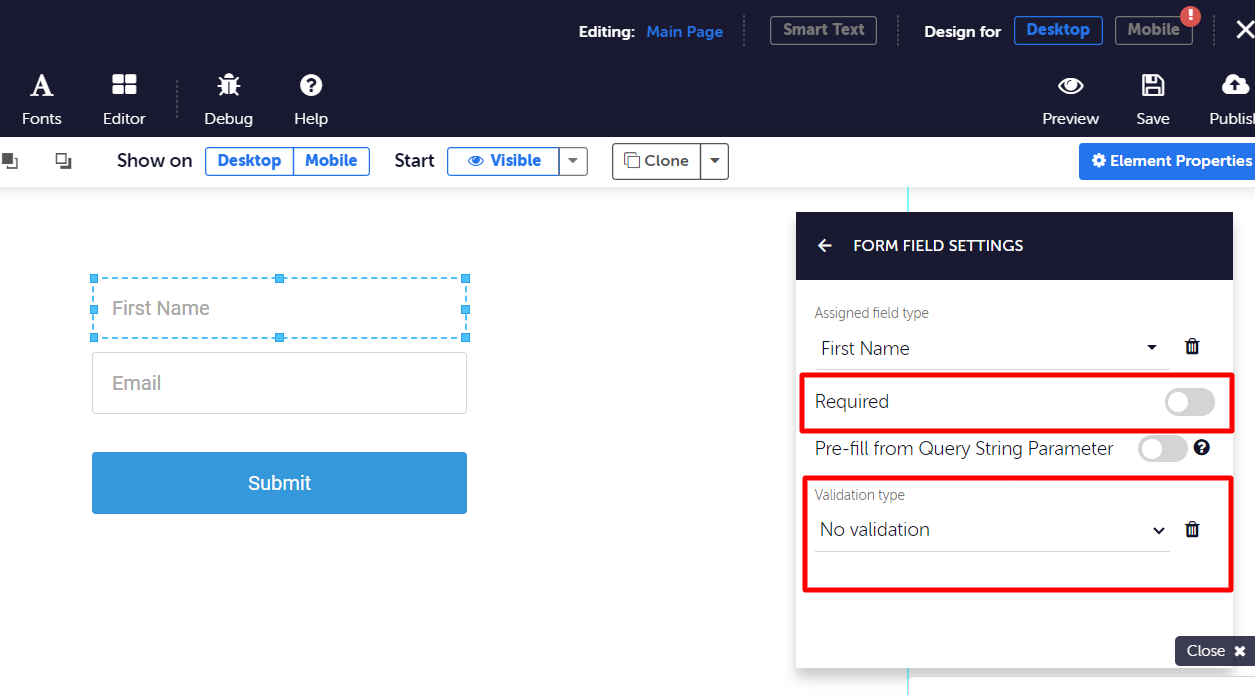
Choose whether this field is Required, and whether you want the field validated, i.e. as a real email address.
Credit card input form elements are already mapped to your payment processor’s settings, so they don’t need to be configured.
NOTE: If you’ve got more than one form entry field on your page with the same TYPE, Convertri will send the one that has the most data in it. So if you’re using an API, you can have multiple forms on your page all attached to the same list, and Convertri will always send the data from the one that’s been filled in.
Button
Finally, to complete your form, you'll need a button.
-
Click on Form Elements in the Elements tray, and drag a Button onto your page.
-
Select your Button, in the Button Settings section of the Properties panel, choose Sign Up from the Mode dropdown menu.
- You can also change the button’s colour, font and style in the Properties panel ‘Button Appearance’.