How To Set-Up and Use Product Variants
[Note: This feature is available on the Standard (plus the Page Importer) / Pro / Agency / Scale and Maximize Plans. If you need this feature and you would like to upgrade to a different plan please contact us at support@convertri.com]
Video Tutorial:
Article:
What Are Product Variants?
Product variants allow you to sell variations of one set product. So an example would be if you sell T-shirts. They are all at a set price, but they have different types, such as colour or size. Setting up product variants in Convertri means you can get your user to select these different types and then send them their selection.
Setting Up Product Variants
You need to set up the product variant on the product itself. To do this:
- Go to the Cart dashboard and select Products from the left-hand menu.
- Either click ‘Edit’ on an existing product or click New Product to create a new product with variants.
- Once the product has a name and a price, select Variants from the left-hand menu. Here you will see the variants modal as shown below:
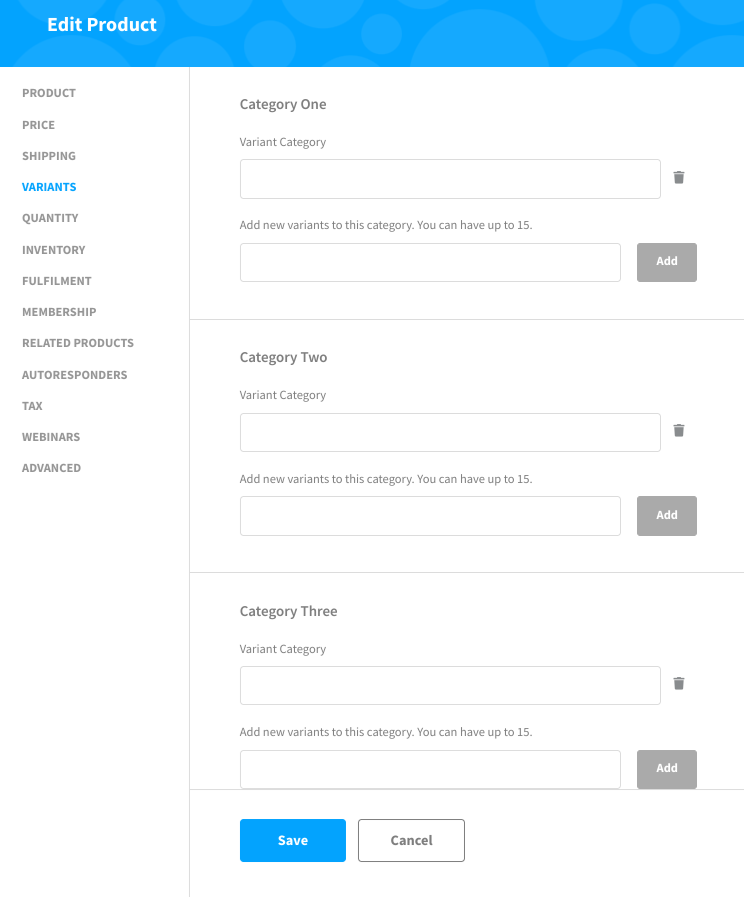
- You can add up to three Variant Categories by entering the name (e.g. Size) in the box with the heading ‘Variant Category’.
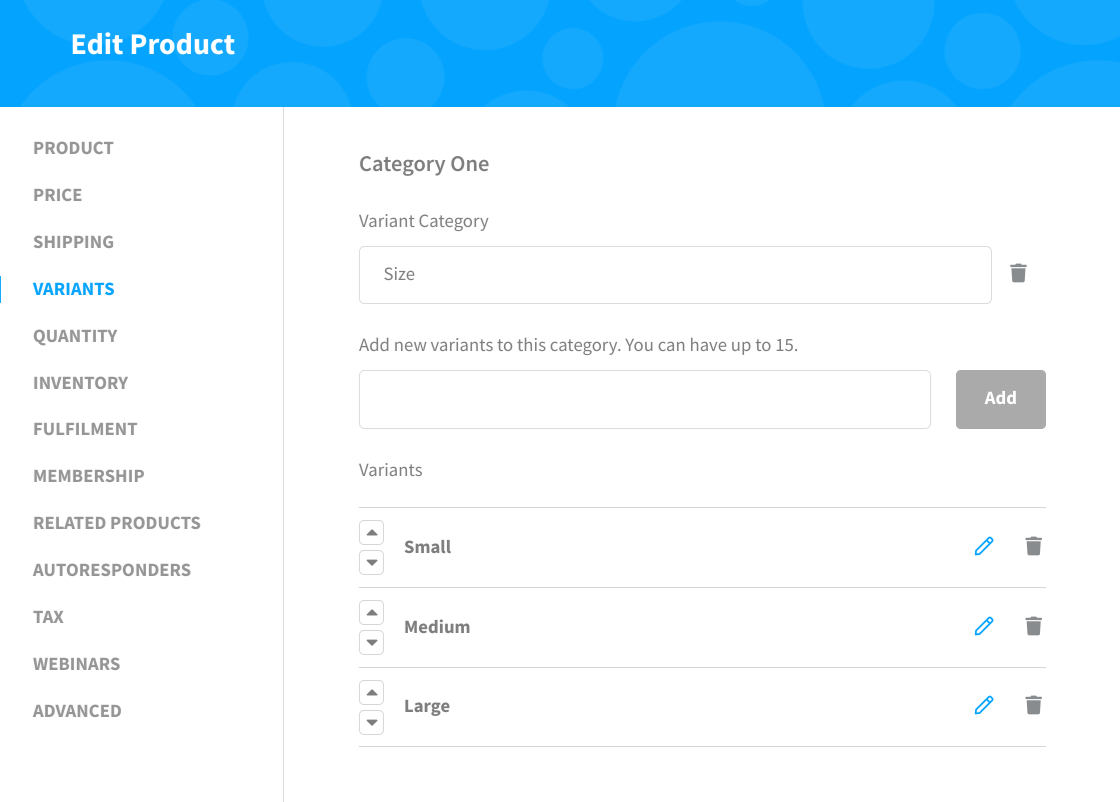
- Then underneath this, you can add up to 15 variants of this category, such as Small, Medium and Large. Type in the name of each variant click Add.
-
For each Variant type, you can edit the name by clicking on the blue pen icon on the name or delete it by clicking the bin icon next to this. If you want to reorder where the options appear in the dropdown, use the arrow options by the Variant’s name to reorder.
- When you’re happy with the set-up of the variants, click ‘Save’.
Setting Up a Working Page With Product Variants
Now you have a product with variants, you can now set this up on a page so your user can give you the details. To do this:
- Go to the funnel and then select/create the page you wish to add.
- Go to the Product option in the top toolbar, select the Variant product, set up your Thank You page and click Save.
- The next step is to add dropdowns for the user to select which variant they want to use. So go to the Elements Tray, and select Dropdown. You will need one for each variant type. So if you want your user to select Colour and Size, you will need two dropdowns.
- These need to be on the page regardless of whether you are using the on-page or Modal checkout. If you don’t add these dropdowns, the product will not be able to be purchased.
- Once you have the Dropdowns, for each one, go to Element Properties, Dropdown Settings, from the Dropdown Options, select Product Variants. This option will only show if you have set up the Product on the page first.
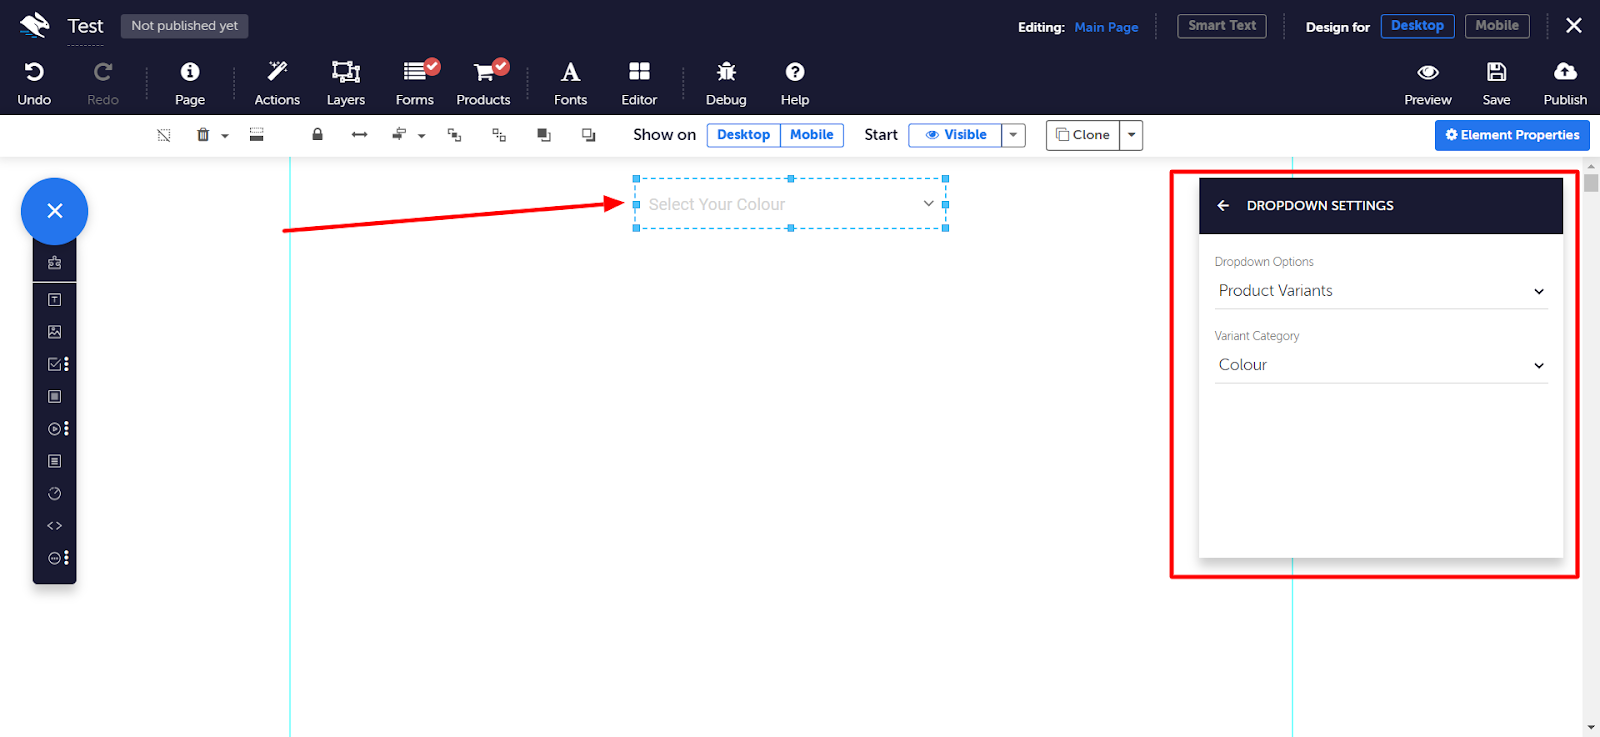
- Choose the Category for the Dropdown and edit the Option Name if needed. Do this for all the categories.
You now have these set up correctly and the user will be able to select the variant they want before making a purchase.
Please Note: You can't use PayPal with on-page checkout if the product has variant’s due to how the API works. It will still work with PayPal in the modal checkout.
Checking Out What Variants Were Purchased
When an order has completed, check what Variant has been purchased:
- Go to the Cart dashboard and select Orders from the left-hand menu.
- Find the order which was made for your product with a Variant.
- Click the blue Details text on this order.
-
Scroll to the Products heading and click the folder icon next to the item quantity.
- There will be a heading ‘Product Variant’; and underneath the variant the user selected will be displayed.
