How To Use Webhooks
[Note: This feature is available on the Standard (plus the Page Importer) / Pro / Agency / Scale and Maximize Plans. If you need this feature and you would like to upgrade to a different plan please contact us at support@convertri.com]
Video Tutorial:
Article:
Webhooks open up extra possibilities for your customers. You can assign a webhook to your product, and you can automatically add buyers to third party services (e.g. membership sites like ProductDyno or Everlesson) when they purchase from your Convertri page. You can also capture leads when the form is submitted.
How to set up Webhooks for Products
NOTE: Before you begin, make sure you have a payment processor set up and ready to go - we offer integrations with Stripe and Paypal.
Also, once you create the webhook in Convertri you’ll need to plug it in at the other end - or, in other words, configure the webhook you just created with the service you want to use, such as ProductDyno or Everlesson. Once you finish setting up your webhook, you need to find where to enter it in the Integrations or Settings section of your account and make sure you enter it and your secret key EXACTLY as they appear on Convertri. If you need a hand with this, please refer to your service’s help documentation.
Here’s how to set up a webhook:
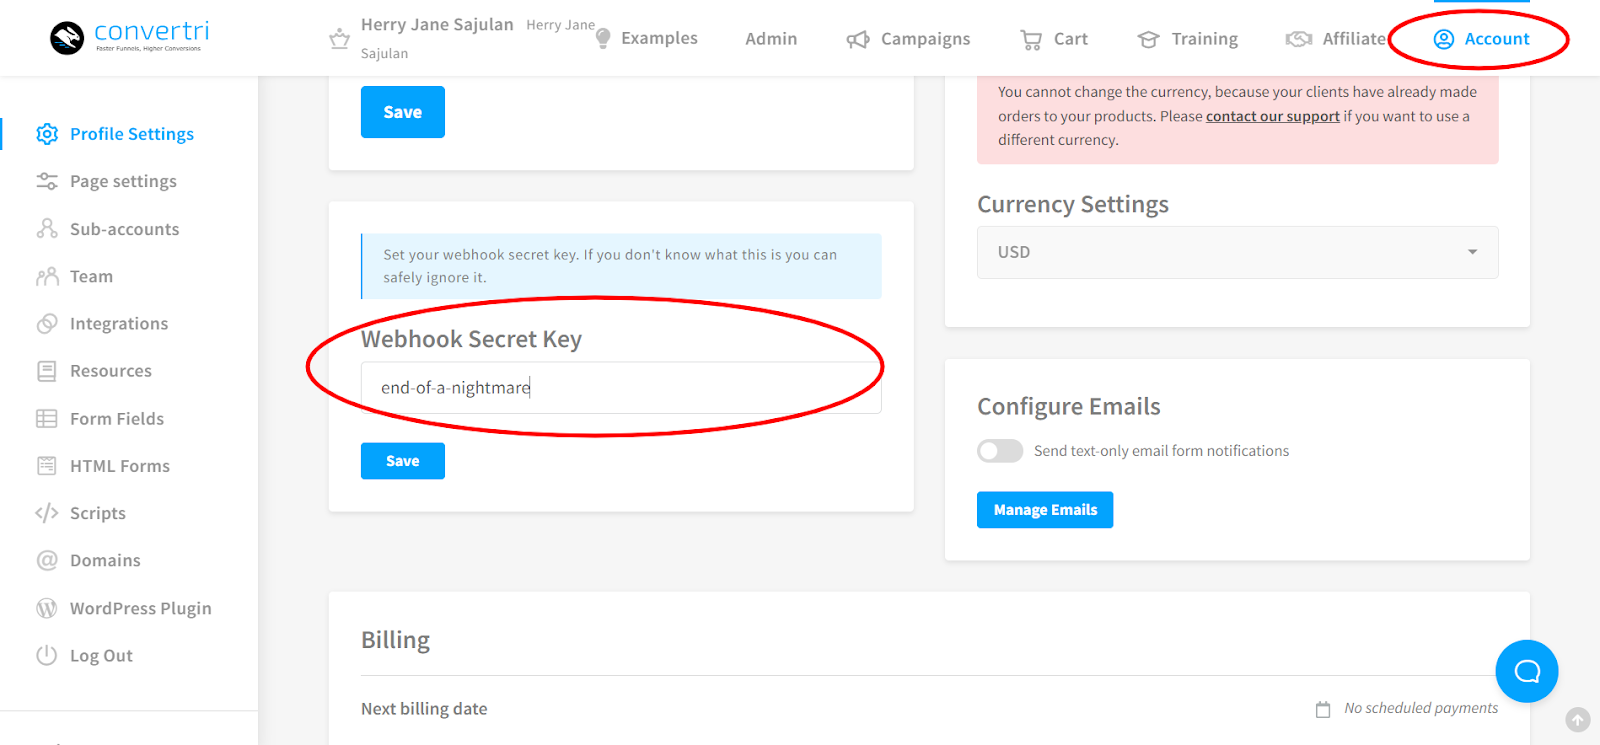
- In the Dashboard, click Account, then scroll to Webhook Secret Key.
- Enter a secret key. This can be any word, phrase or code (we recommend no spaces). Click Save
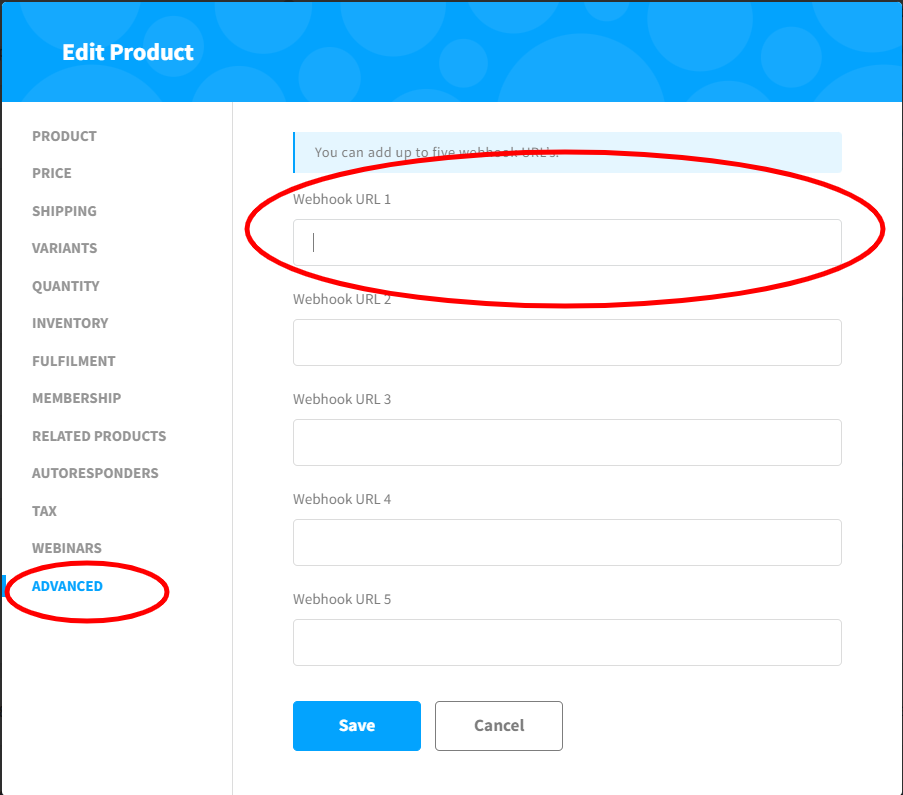
- Click Cart, and click New Product or click Edit next to the existing product you want to attach a webhook to.
- In the left hand menu, click Advanced and then type the URL generated by your service of choice - find it in the Settings or Integrations section in your account on their website after you enter your webhook. (If you need a hand with this, refer to your service’s help documentation.) Click Save.
- You can add more than one webhook URL per product.
- Create a sales page for your product, with a checkout form and Buy button. To find out how to do that, click here.
How to set up Webhooks for Forms
- Assuming you have already added your Webhook Secret Key, in the page editor click on Forms.
- In the Configure Form dialogue, go to Zapier and Webhooks.
- Then add the URL generated by your service of choice - find it in the Settings or Integrations section in your account on their website after you enter your webhook. (If you need a hand with this, refer to your service’s help documentation.) Click Save.
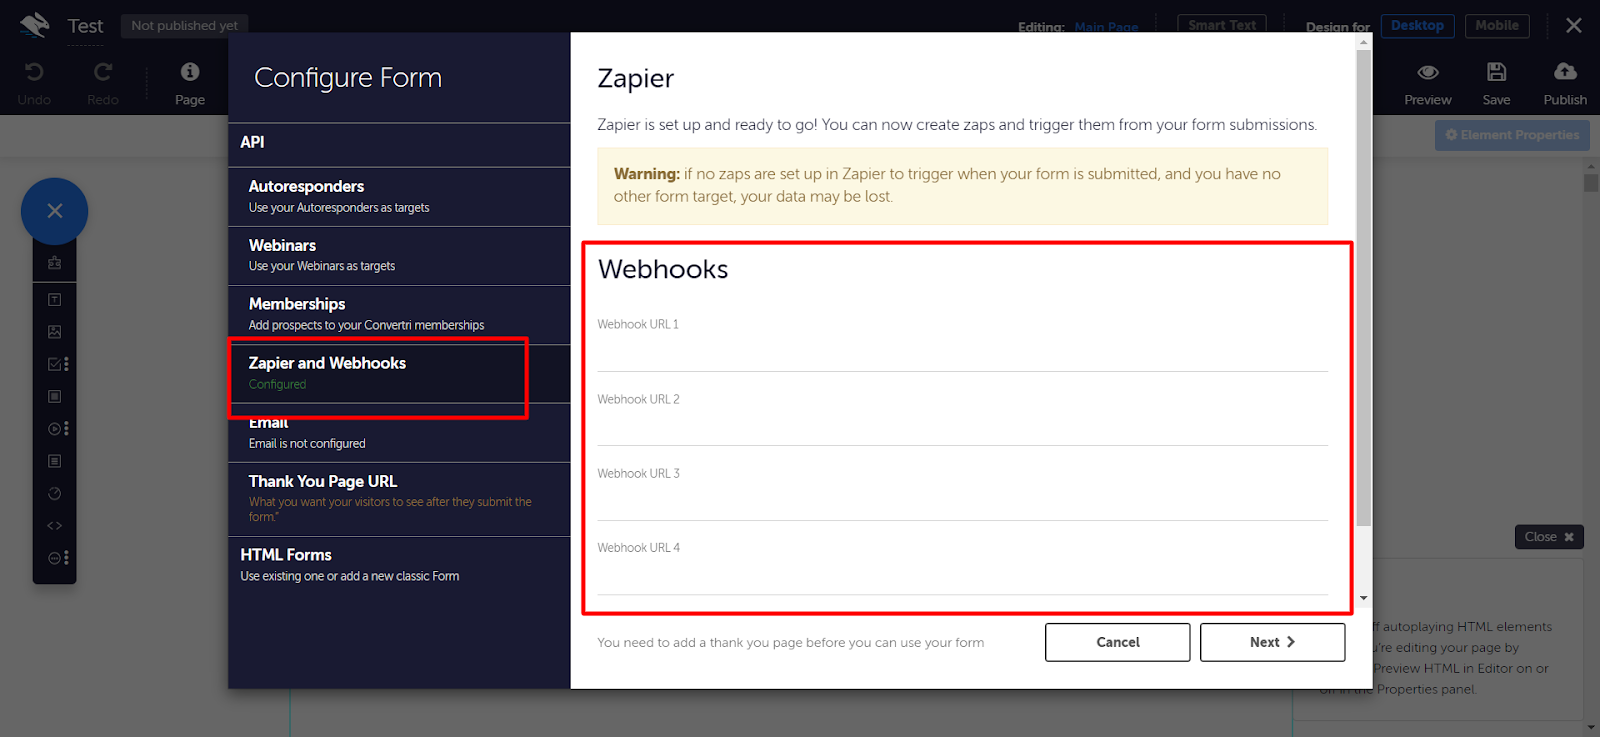
- You can add up to 5 webhook URLs per form.
- Create a page for your opt-in form, with a submit button. To find out how to do that, click here.
That’s it! Once your page is live, your webhook will be fully functional.