How to Set Up a Contact Form
Video:
Article:
This is a tutorial about setting up a simple contact form in Convertri.
Inserting a contact form on your page lets you collect essential information such as names and email addresses, as well as extras like shipping addresses, websites, and more.
Once you publish your page, whenever someone fills out and submits your form, the information they have entered will be sent inside an email message to your inbox.
Ready? Let’s get started!
First, we’ll configure the form. This sets up the behind-the-scenes magic that makes form submissions work.
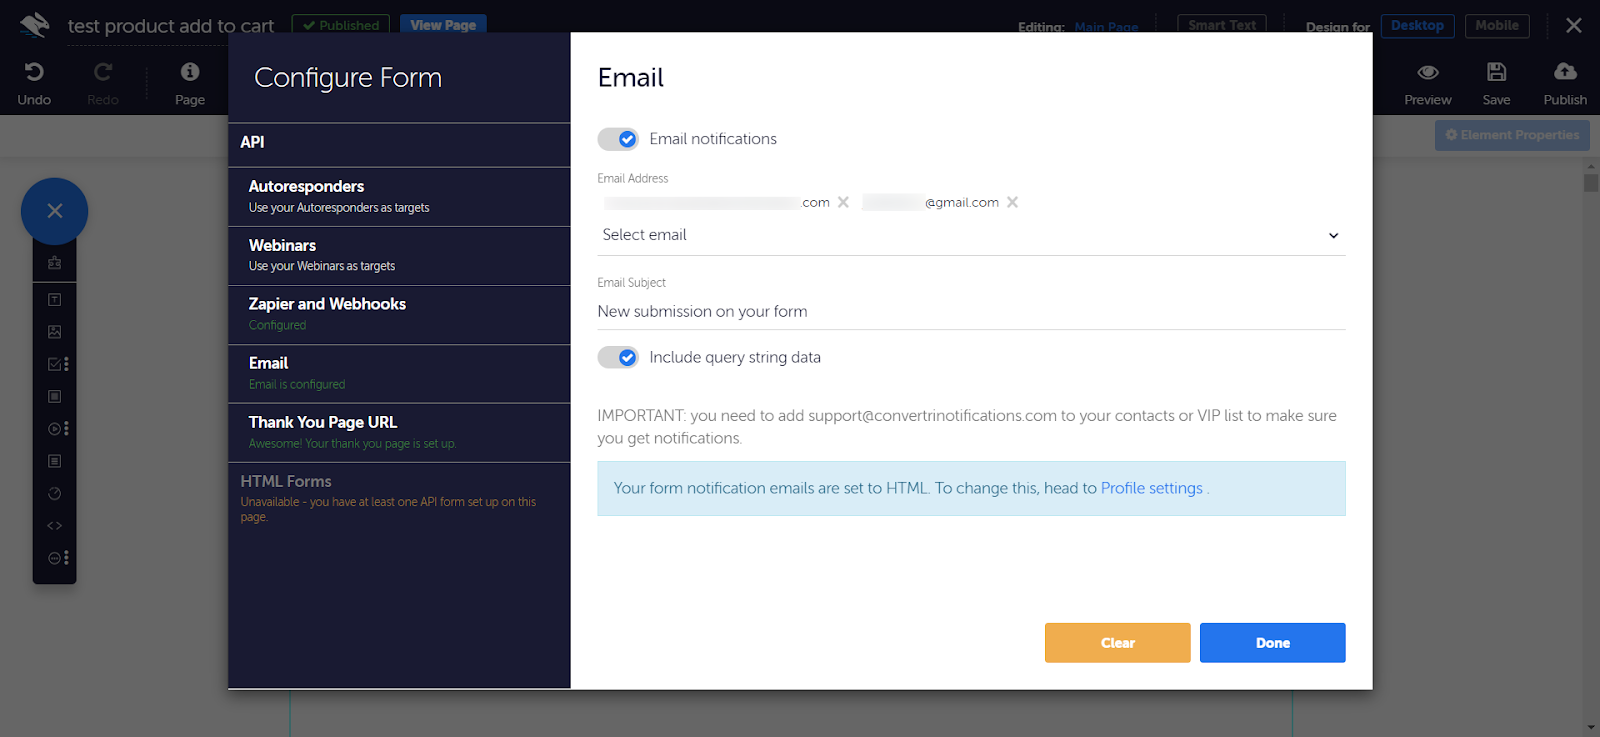
- In the Page Builder, click Forms in the top toolbar.
- Click Email in the left hand menu, and toggle email notifications to On.
- Edit the subject line if you need.
-
Email verification notification will be sent from support@convertrinotifications.com so be sure you whitelist the email address as sometimes your email providers block unknown email addresses.
Note:If you have already whitelisted the email and still you haven’t received the email verification please check your spam / junk folder as sometimes email gets lost to those folders.
-
Next, click Thank You Page in the left-hand menu. Enter the URL of the page you want your prospects taken to after they click Submit. (This could be your thank you page, upsell page, main website, or anything else.)
Note: alternatively, you can toggle Stay on Page to On. This means that form will be submitted, but the user won’t see a confirmation. In this case, it's a good idea to add a pop up layer to let your prospect know the form has been submitted successfully.
-
Click Done.
Next, we need to add the form to our page. This means adding form fields for each type of information you want to collect, and “mapping” them to help Convertri deliver information to you.
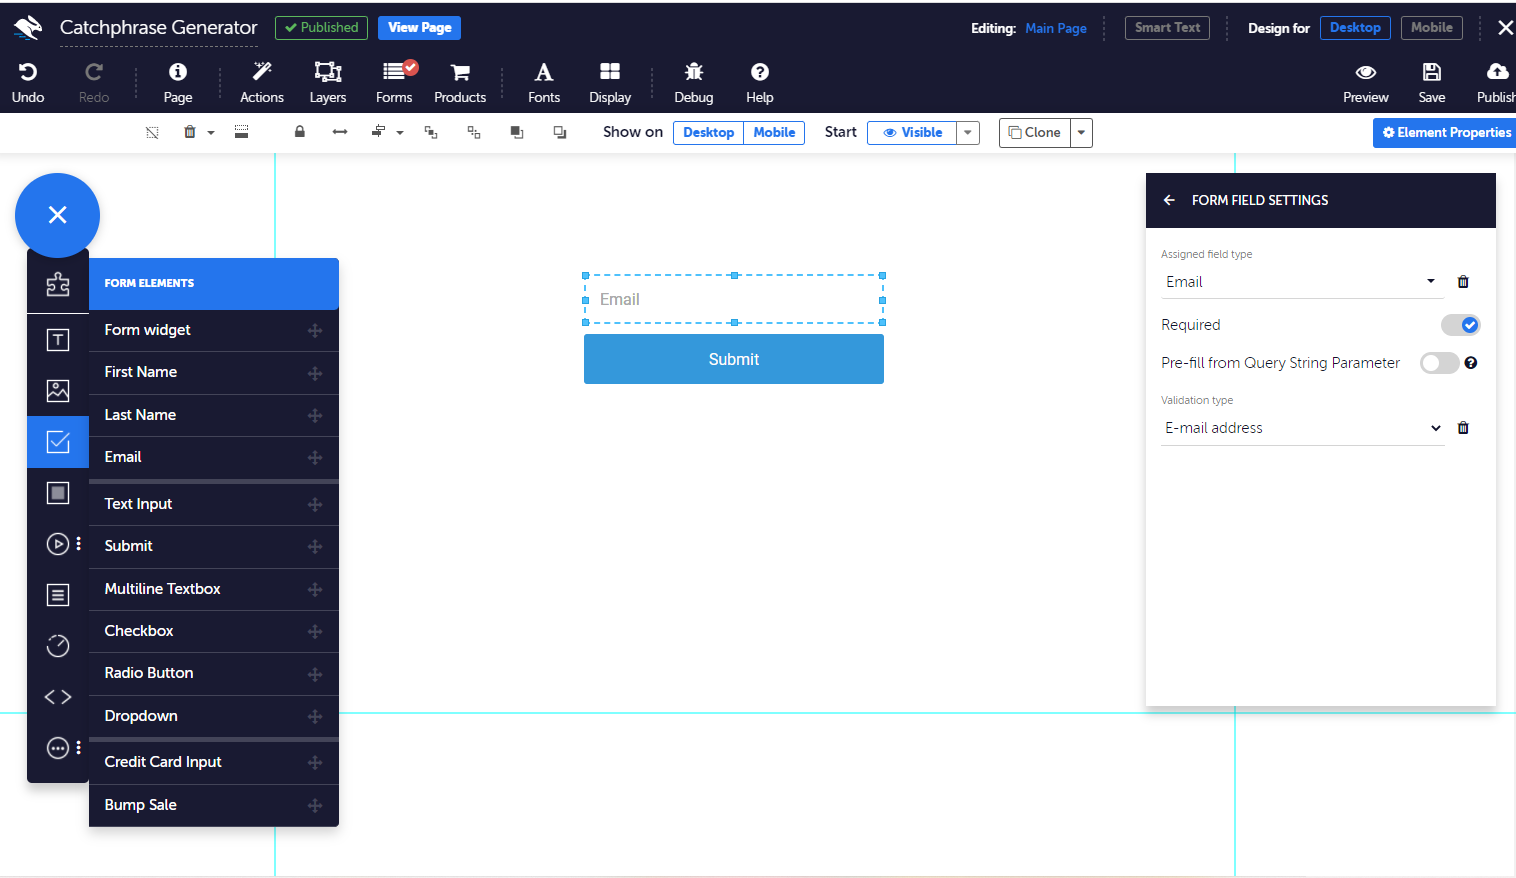
- Click Form Elements in the elements tray. First, drag a Text Input onto your page.
- With your Text Input element selected, click Form Field Settings in its Properties panel.
- Choose the field type from the dropdown menu according to what information you want entered here. For example, if you want this box to be for email addresses, click Email. Toggle the Required switch if you don’t want users to be able to submit the form without entering this info. You can also choose to use form field validation to make sure the info entered is in the proper email format.
- Next, click the arrow to go back to the main Properties panel menu. Click Input Properties. Here, you can enter placeholder text to let users know what information to enter (and help you remember which form element is which)
- Next, drag over more Form Inputs from the Elements tray to complete your form. Build your form to collect as much info as you need, including First, Middle, Last and Full Names, Phone Numbers, and more.
IMPORTANT: remember you NEED to map every one to its field type in the Properties panel!
When you’re done, don’t forget to Save and Publish your page. Click View to open your page in a new tab, and try sending yourself a test response. You’ll receive an email in the inbox of the email listed as your main Convertri account every time your form is submitted.
But what if I want to collect other information?
Sometimes, you’ll want to collect feedback, job quotes, or just people’s favourite color.
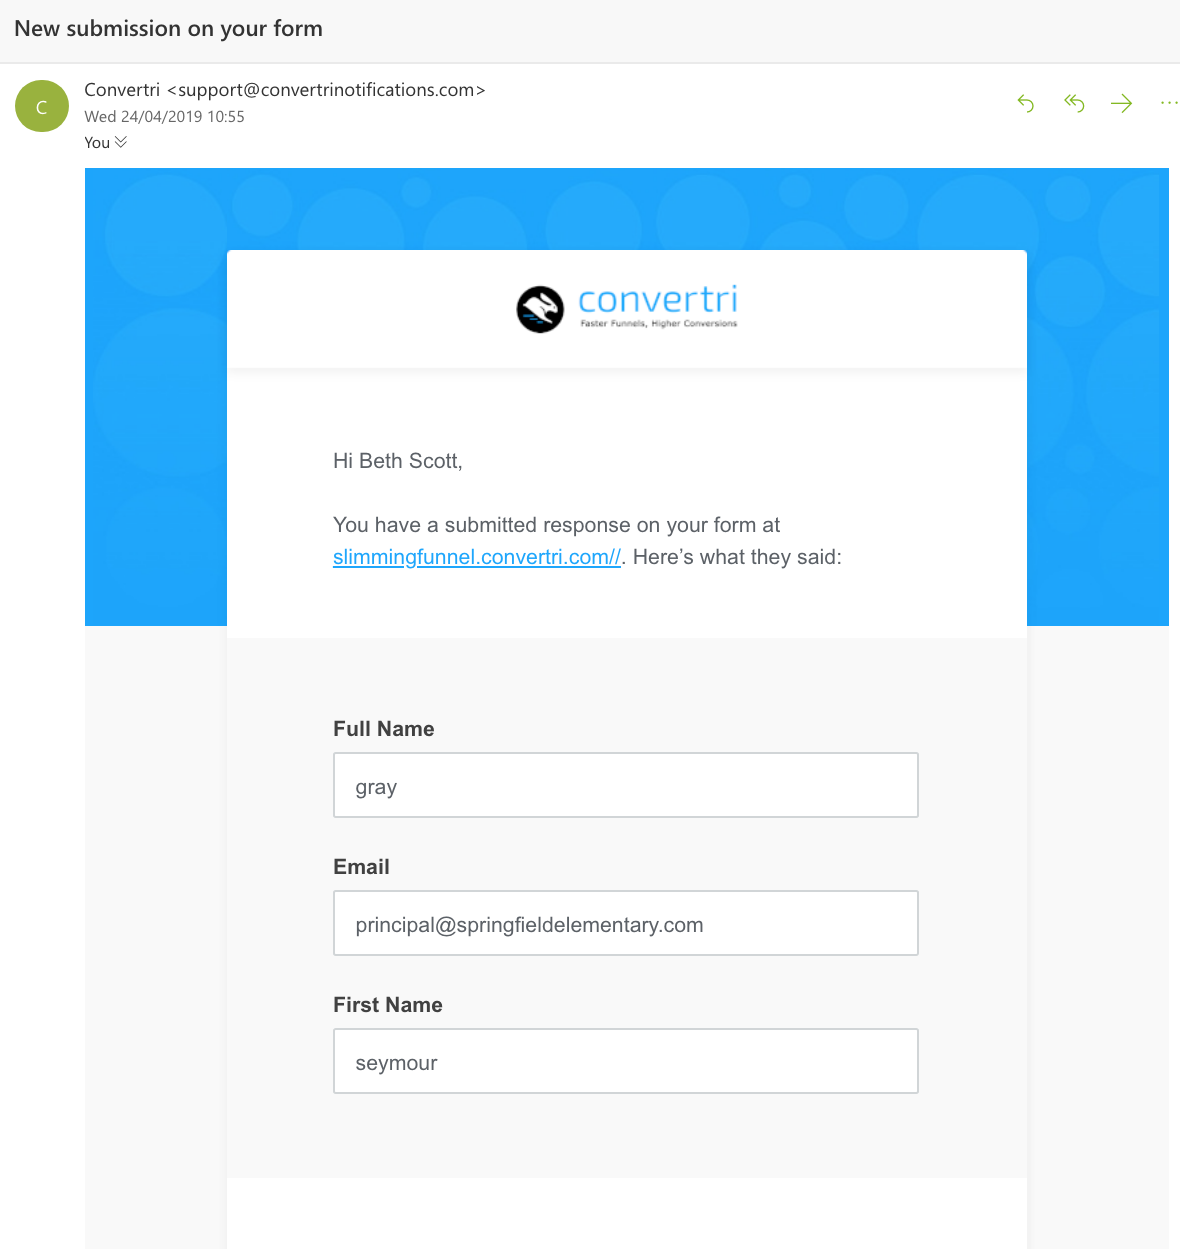
To create your own custom field, all you need to do is choose a form field type that isn’t being used, e.g. Full Name. Then, set the placeholder text to which information you want the user to enter. When you receive your form submission notification email, your custom information will be listed under the form field type you used - you’ll be able to tell by what’s written!
NOTE: If you’ve got more than one form entry field on your page with the same TYPE, Convertri will send the one that has the most data in it. So if you’re using an API, you can have multiple forms on your page all attached to the same list, and Convertri will always send the data from the one that’s been filled in.
This is an example of the kind of notification you can expect. In this form, we used the Full Name field to collect favourite colour:
But what if I want the emails to go to my clients instead?
If you have an Agency account, you can send a contact email to your client's email address, but they must be listed as a user on the sub account that contains the page that you want to set up the contact form on.
- In the Email section of the Forms dialog, click to let your client receive form responses.
- You'll be taken to the Clients screen, where you'll see a confirmation message letting you know your client will receive form responses. Click the button to toggle form responses back to you.

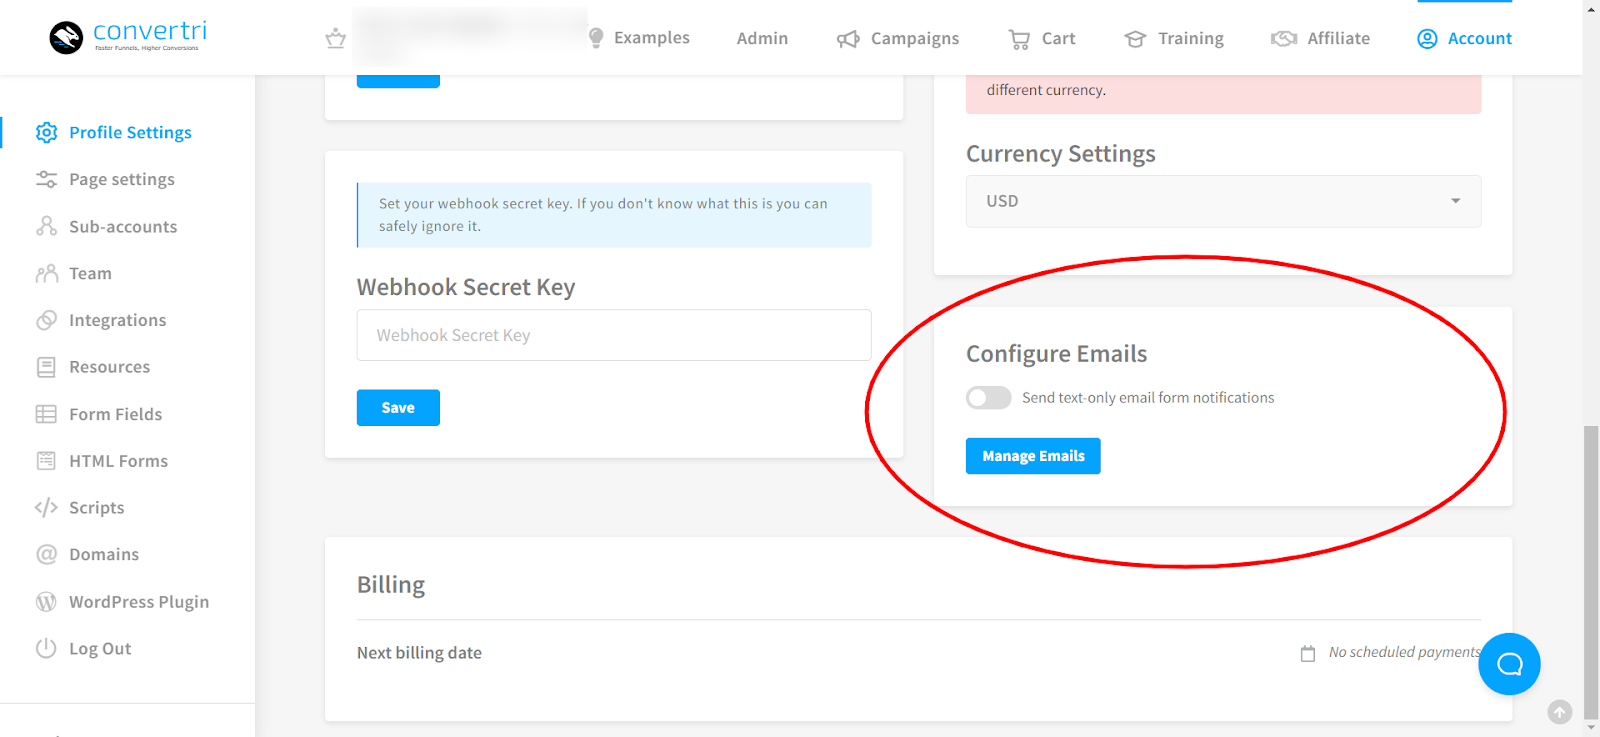
Can I make my notification emails text-only?
Yes, you can! Click on Account in the Dashboard, then head to Profile settings in the left-hand menu. Then toggle text-only form notifications to On.