How to Create a Dropdown Menu
Video:
Article:
Please Note: This is an alternative to using our menu element, we recommend you try that first to see if it suits your needs. You can find the details here.
Creating a dropdown menu is easy to do in the Page Builder with actions and events. In this guide you'll create one menu panel, and two menu buttons – one “inactive” and one “active” - that will switch the menu from hidden to visible on mouse click.
NOTE: This tutorial is for a dropdown menu that is click-based. Creating mouse leave/enter-based dropdown menus is not currently advised.
First create two buttons, one “inactive” (i.e. the one that will be shown on page load) and one “active” (the one that will show when your menu is clicked:
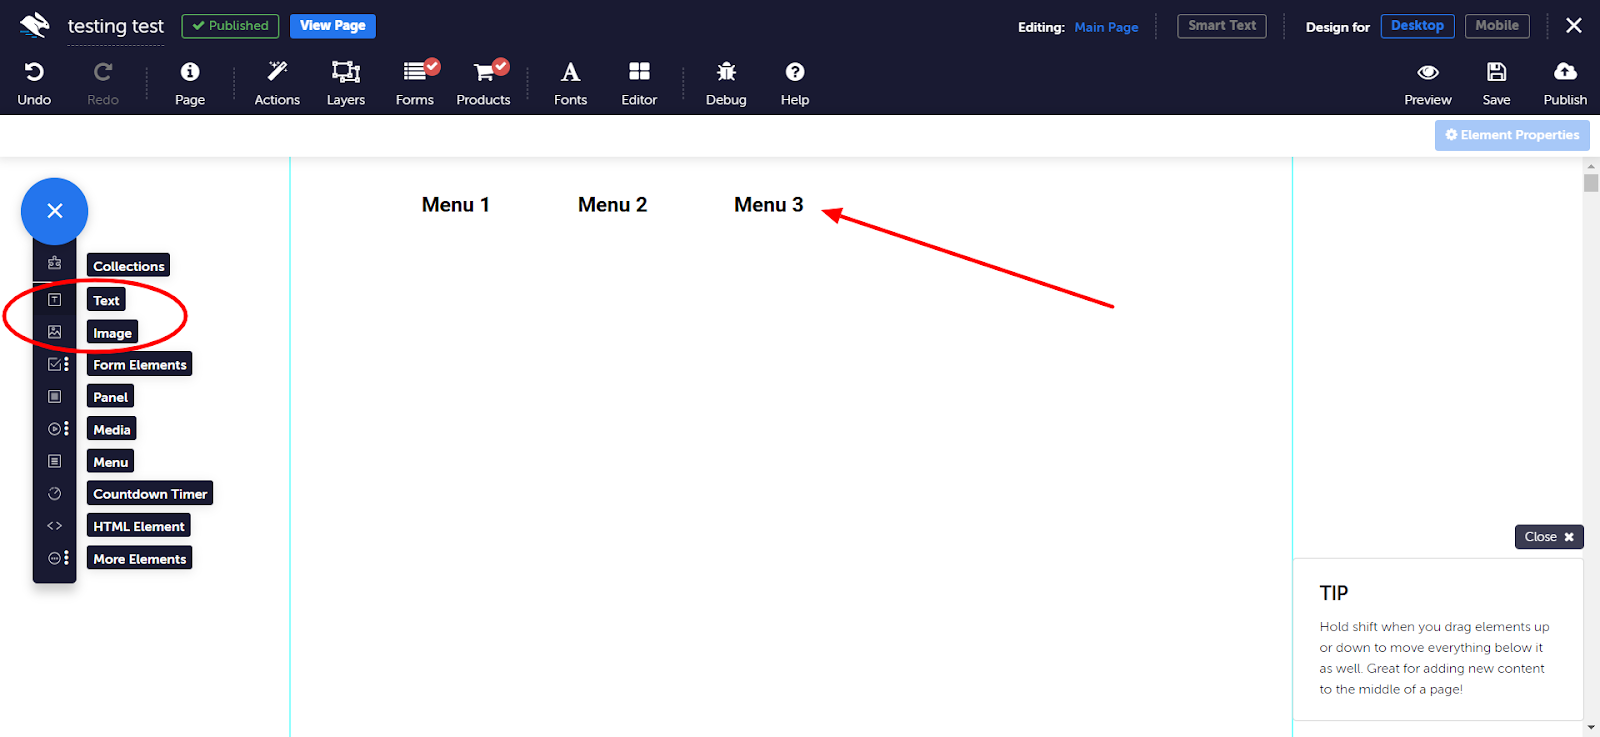
- In the Page Builder, create a menu button using a text or image element. This will be your “inactive” menu button.
-
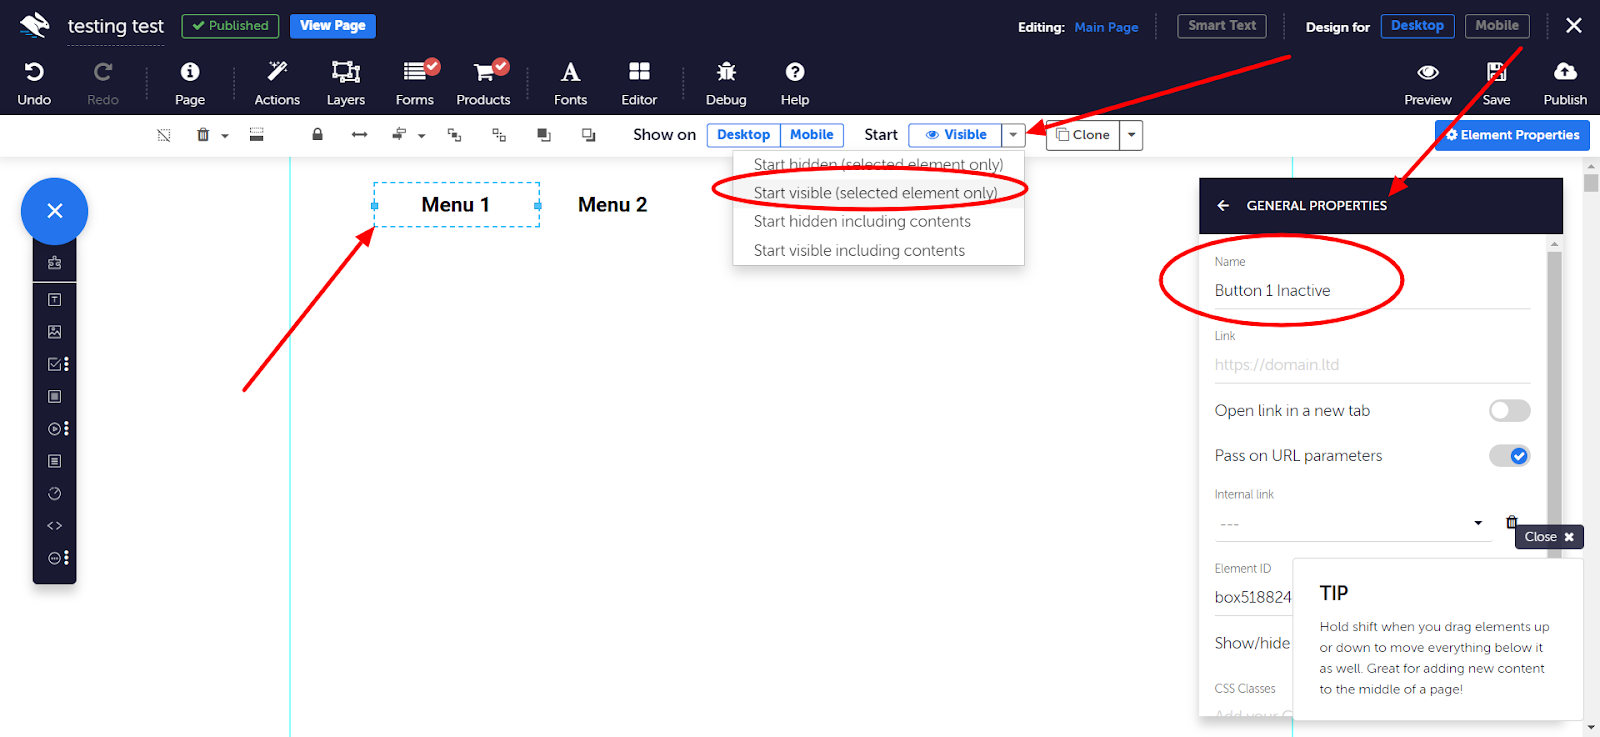
With your inactive menu button selected, go to Element Properties > General Properties. Enter a name, e.g. Button 1 Inactive. Make sure its visibility settings are set to Start Visible (Selected Element Only).
-
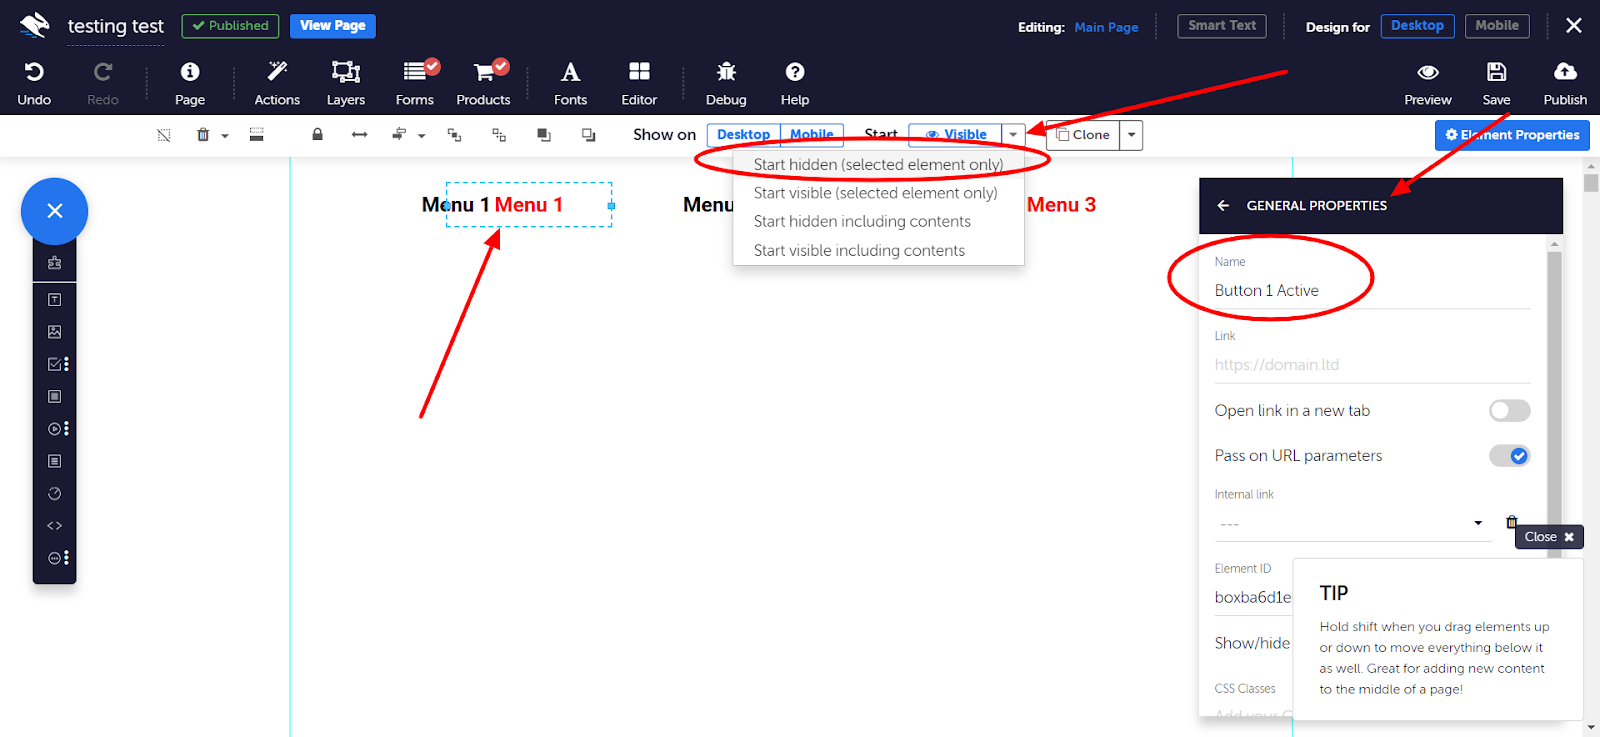
Next, you will need to clone your menu button. To do this, select the button you wish to clone, and click 'Clone' in the quick action toolbar next to the 'Start' menu. Then change the name of your cloned button so you know that this button will be active, for example, 'Button 1 Active'. This is the button that will show when your menu is active, so you might want to change its colour or add a shadow. For now, place it next to your inactive button, and set it to Start Hidden (Selected Element Only).
Now, create your menu panel, which will contain the options:
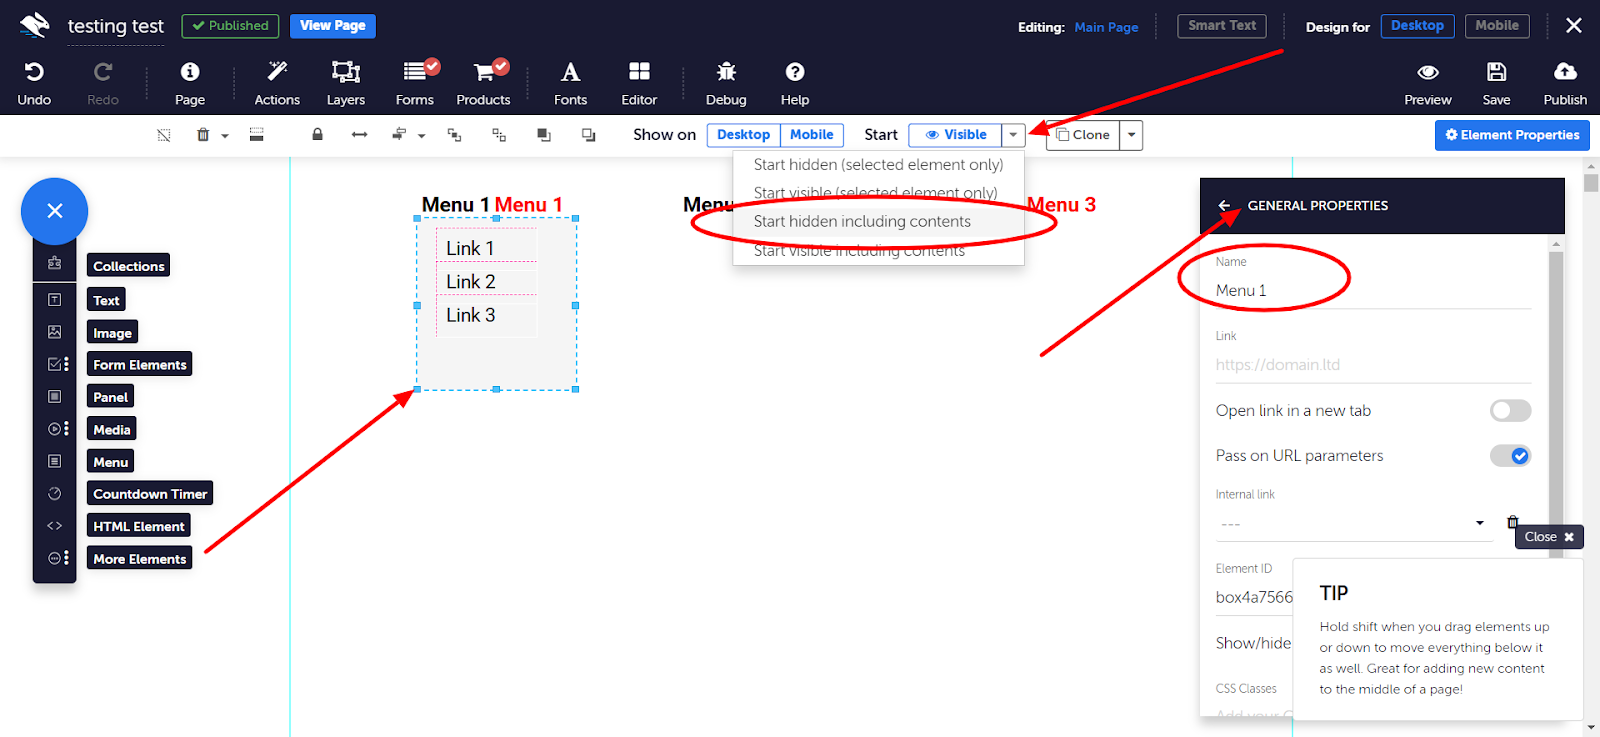
- Add a panel element from the Elements tray, and resize and move it directly underneath your inactive menu button. Add text links and make sure they're contained within the panel.
-
With your menu panel selected, change its name using the Properties panel, e.g. Menu 1. Change its visibility settings to Start Hidden (Including Contents).
Next, adding actions to each of the buttons makes it possible to show and hide the menu on click:
-
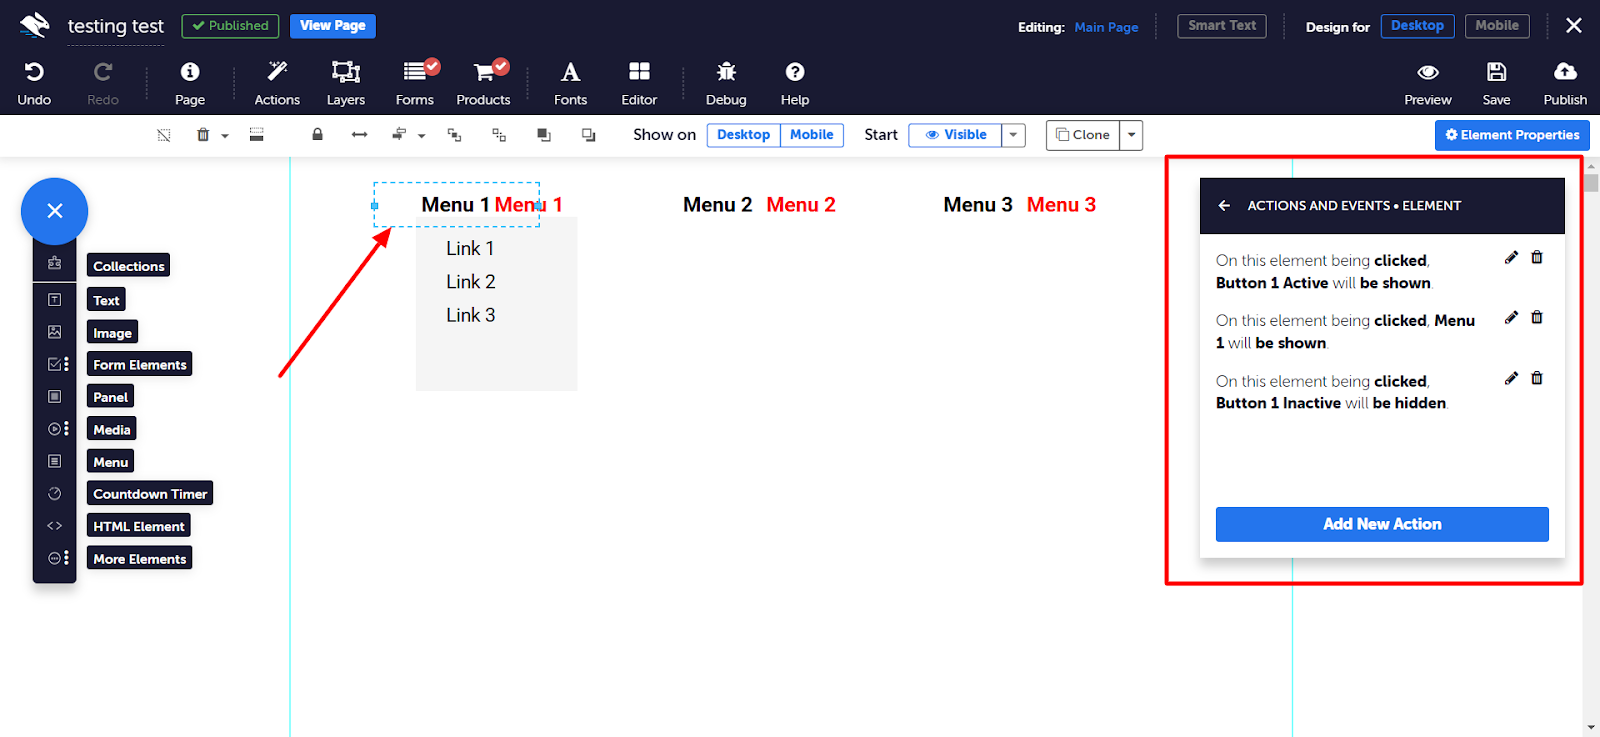
With the inactive button selected, go to Element Properties > Actions and Events. Click Add New Action, and configure the action as follows:
Event Type > On Click
Action > Show>Show target
Target > (Button 1 Active)
-
Click Done. Click Add New Action, and configure the action as follows:
Event Type > On Click
Action > Show>Show target
Target > (Menu 1) and toggle ON ‘Include Contained Elements’
-
Click Done. Click Add New Action, and configure the action as follows:
Event Type > On Click
Action > Hide>Hide target
Target > (Button 1 Inactive)
That's your inactive button all set up. Next, select your active button.
-
With the Active button selected, go to Element Properties > Actions and Events. Click Add New Action, and configure the action as follows:
Event Type > On Click
Action > Hide>Hide target
Target > (Menu 1) and toggle ON ‘ Include Contained Elements’
-
Click Done. Click Add New Action, and configure the action as follows:
Event Type > On Click
Action > Hide>Hide target
Target > (Button 1 Active) and toggle ON ‘ Include Contained Elements’
-
Click Done. Click Add New Action, and configure the action as follows:
Event Type > On Click
Action > Show>Show target
Target > (Button 1 Inactive)

These steps are necessary to configure the buttons to show and hide on the relevant clicks.
- Finally, move the active button element directly on top of the inactive button element.
- Click Save, and Preview.
If everything works as it should you'll be able to click your inactive button element, which will trigger actions to both hide the inactive button, show the active button and show the menu. Clicking the active button should hide the menu and hide the active button element, showing the inactive button again.