How to Connect a Form to a Service Using API
Video Tutorial:
Article:
Form API’s let you connect to popular services for easy integration. If you already have form elements on your page, or you want to add them later, you’ll need to connect your form service first:
- Click the Forms button in the top toolbar.
- In the Configure Forms dialog, click the type of service you want to integrate: Autoresponder, or Webinar. Then, choose your service from the menu.
- If you haven’t integrated your service already, you’ll be prompted to open Integrations in a new tab. You can integrate your services (or remove them) at any time by heading to the Dashboard, clicking Account in the top right hand corner and then clicking Integrations in the left hand menu.
- Depending on the service you connect, you’ll be prompted to choose the list you want your form to add prospects to.
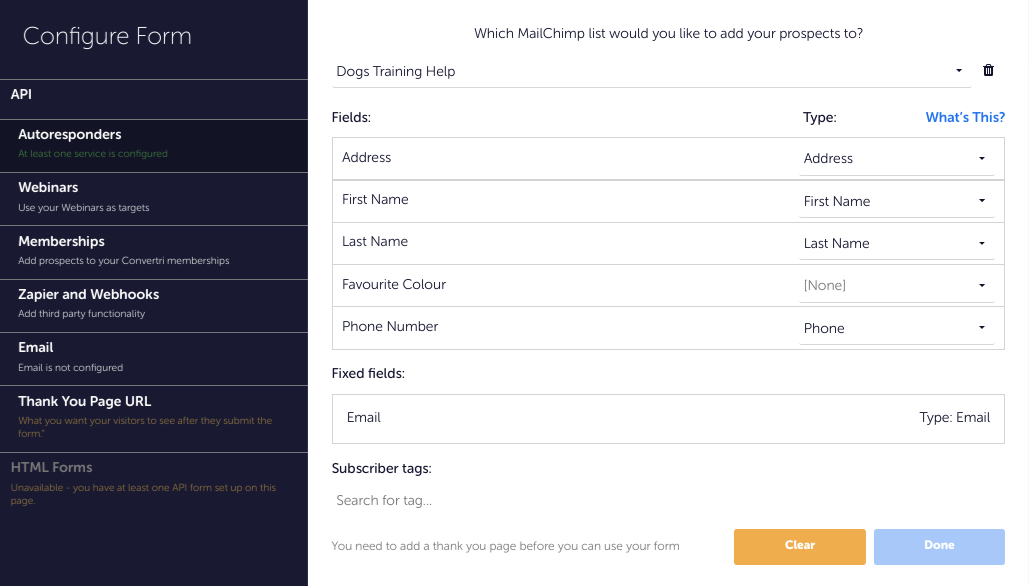
- Connect the form fields in your service to the form inputs you’ll add to your Convertri page. When you select a field type here, that’s the field the information will be entered into in the autoresponder or webinar service. If you want to collect information that doesn’t have a corresponding field type, you can use any one that isn’t already mapped and match it using the Forms dialog. Some form fields are fixed, so they cannot be changed.
- You may also choose tags to use with your list. If you’ve already created some in your autoresponder, Converti will be able to fetch them. If you haven’t, you can type in your own for Convertri to apply. In MailChimp, groups act as tags. For more information, click here.
- When you’re done, click Post-Submission Redirect to enter the URL of the page you want your prospects taken to after they click Submit.
- Click Done.
You can connect both autoresponder and webinar services to one form, to sign up prospects to both lists at once: simply repeat steps 2-5 to add another service.
Your form is connected to your page, and you can now add form inputs. These are the elements your prospects will interact with on the page.
- In the Page Builder, click the Form Elements button in the Elements tray. Choose the input you want to add first, and drag it onto your page.
- In the Properties panel, click Form Field settings to map your form fields to the values you assigned when you configured your form service. Assigned field types will be shown in bold on the dropdown. Choose your field type to make sure the input is sent to the form service correctly.
- Choose whether this field is Required, and whether you want the field validated, i.e. as a real email address.
Credit card input form elements are already mapped to your payment processor’s settings, so they don’t need to be configured.
Likewise, Submit buttons have only one function - to send any data entered - but you can change the text by clicking General Properties.
WARNING: adding a link to a Submit button will override the ‘submit’ function, turning the element into a link instead of submitting the form.
A bit stuck? Check out our Forms Troubleshooting Guide.