How to Add a Countdown Timer
Video Tutorial:
Article:
Countdown timers add urgency to your sales pages and offers. You can customise them however you like:
- Click the Countdown Timer element in the Elements tray to add it to your page.
- In the Properties Panel, click on Countdown Timer Settings.
- Choose your countdown mode: fixed, evergreen or restart.
- Fixed will count down to a specific point in time, such as a special event. Set the end date and time, and choose the time zone your timer is in, and your timer will show the equivalent duration remaining wherever your user is based.
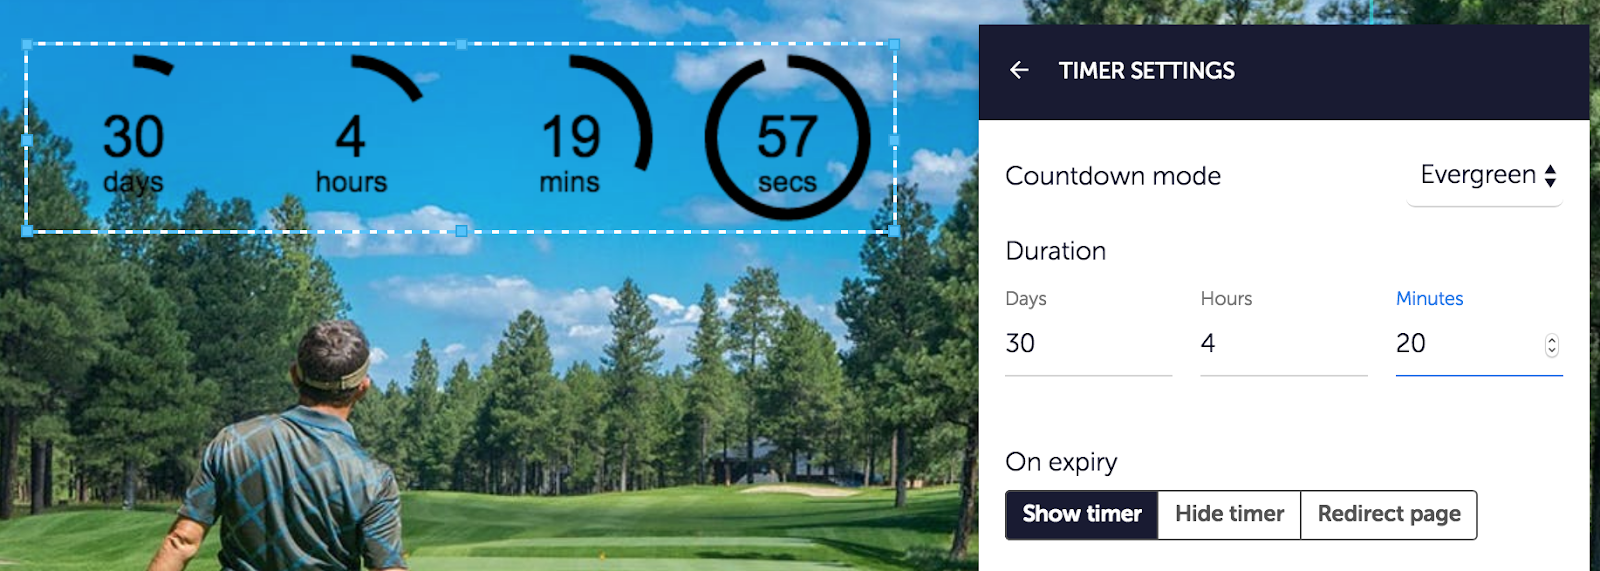
- Evergreen will count down a specific duration of time from when the user loads the page, such as two minutes remaining. You can set the duration.
In this mode, you can also select what level of time to show on the countdown timer.
To do so make sure to set your countdown timer mode to Evergreen. Then go to ‘Timer Appearance’ in the Properties panel. You can see a switch option at the bottom of the tab allowing users to turn on and off the display by Days, Hours, Minutes and Seconds with standard active and inactive designs.NOTE: Switching off a time period will switch off all greater time periods - so switching off ‘Hours’ automatically switches off ‘Days’. You cannot have a timer which shows Days, Minutes and Seconds. Conversely, switching on a time period will automatically switch on all shorter periods.
You can only switch off time periods when:
1. The period is set to 0 in the Timer Settings tab.
2. All greater periods are set to 0 in the Timer Settings tab. So in a situation where the timer is set to 0 days, 3 hours, 0 minutes and 0 seconds, you could switch off days but not hours, minutes or seconds.
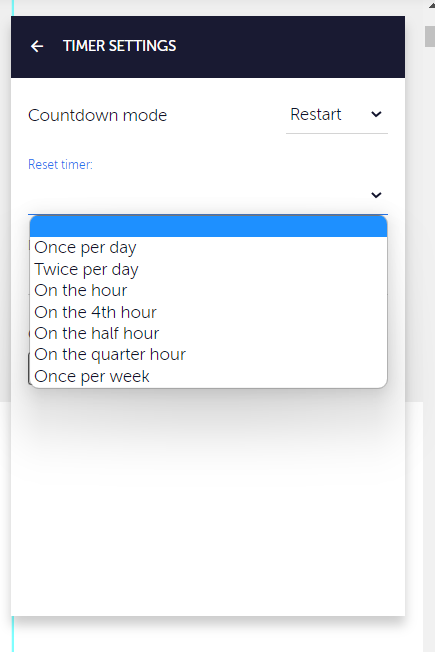
- Restart lets you reset your timer to once or twice per day, an hour / forth hour / half an hour / quarter hour or once per week. It includes a delay feature, where you can prevent visitors returning quickly after leaving your page from seeing a refreshed timer.
- On all types of timer, you have the option to show timer, hide timer, or redirect the page when they run out.
- Show timer will keep the timer showing on the page at 00:00.
- Hide timer will make the timer invisible on expiry, leaving empty space.
- Redirect page will take anyone browsing the page at the time of expiry to a new page. - Click Redirect, and you can enter the URL you want your visitors to be taken to once the timer expires.
Using Multiple Countdown Timers on a Page
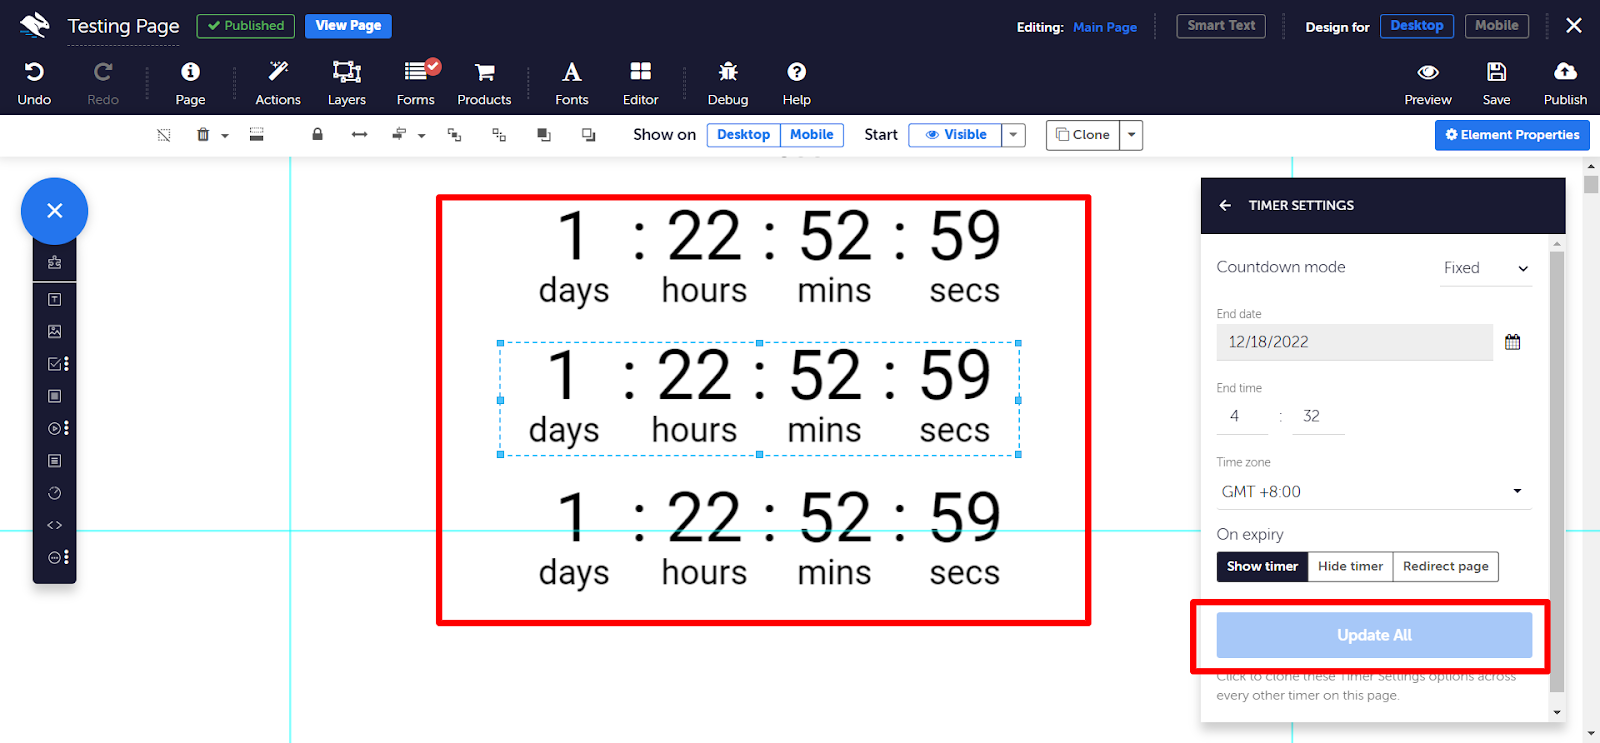
If you have more than one countdown timer on your page, and you want the countdown timers to display the same times, go to the Countdown Timer’s element properties >>> Countdown Timer Settings.
At the bottom of the tab you will see an ‘Update All’ button, by clicking on this it will copy the options set on the Timer Settings tab for this timer, and apply them to every other timer on the page.
NOTE: Other settings (e.g. font, skin etc) will not be copied across - only the options in Timer Settings.
Timers will keep the existing defaults when they’re added to a page. This option only affects the timers currently on the page when it’s clicked.
You can also alter the appearance of your countdown timer.
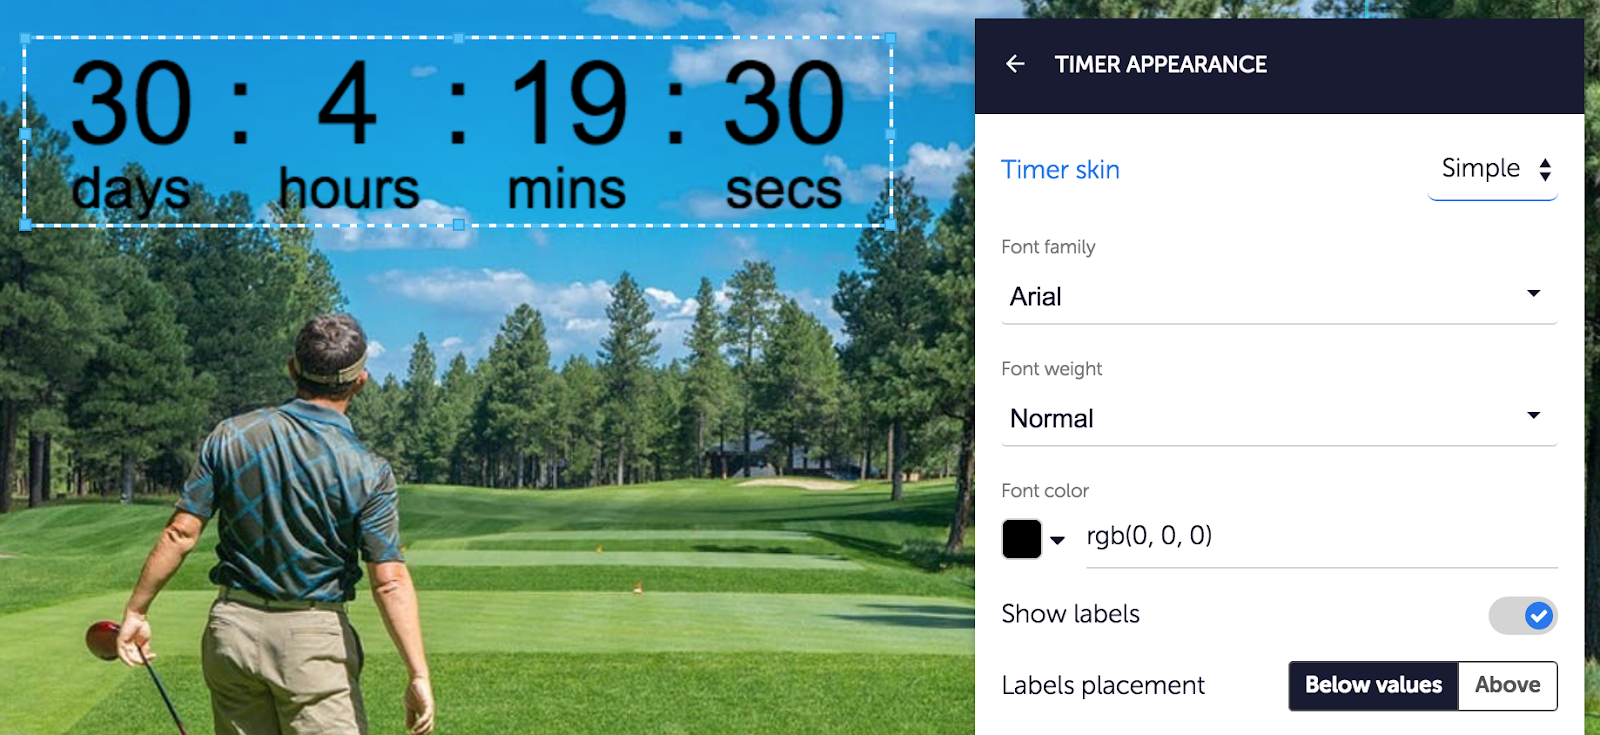
Select your countdown timer, and in the Properties panel, click on Countdown Timer Appearance. Select your skin:
- Simple shows numbers and labels only.
- Circular shows numbers, labels and a disappearing arc around the units of time.
- Expires On shows the expiry date of the timer.
- You can also choose the font, font weight and color of the text, and color and width of arcs if the Circular skin is enabled. If the Simple skin is enabled, you can also choose to display the labels below or above your numbers.
Starting and stopping countdown timers based on page events:
To set up action on your countdown timer select your timer, and in the Properties, panel click on Actions and Events.
Click on Add New Action
After selecting your preferred Event Type, choose Countdown Timer

You are presented with two options:
- Start timer - which will start a paused timer running again
- Pause timer - which will pause a running timer
If the Countdown Timer has been named, it will be shown in the recommended dropdown selection at Target. If you haven’t named the element it will be shown as ‘Countdown Timer’.
Start Paused (Evergreen only)
In ‘Timer Settings’ if the Countdown mode is changed to ‘Evergreen’, a new toggle option becomes available called ‘Start Paused.
If this option is toggled on, the countdown timer won’t start until the ‘start timer’ action in ‘Action and Events’ has been triggered by your user.

NOTE: Once the timer has been started it won’t pause again if your user leaves and returns to the page.